Want to create a direct link with your website visitors? To do so, I suggest you create a contact form on your website. Indeed, this is a very important element that it is particularly wise to consider. Indeed, it sometimes happens that your visitors want to learn more about you and your service, and therefore want to contact you directly. For example, they may have questions or special requests, such as a personalized service, after browsing the products or services offered. And an adequate answer is likely to convert them into a customer, so you will agree that it would be a real shame to miss this opportunity. For this purpose, I’ll show you step by step how to create a contact form yourself with a very famous plugin: Contact Form 7. Please note that this article is accompanied by a practical and complete video. So follow along!
Create a form with Contact Form 7
Discover in my video how to get a contact form on your website by installing and setting up Contact Form 7
:What is a contact form?
When creating a website, you may feel the need to set up a contact form. Indeed, this element allows your visitors to request information in two or three clicks only, and this, without going through their mailbox.
This is a very important point for the visitors since the fact of having to take their mailbox to write to you will make a lot of people abort the process. And there is very little chance that they will do it again later, which obviously makes you lose potential customers.
Even if it is important for all websites, the contact form is essential for specific contexts such as :
- Commercial prospecting ;
- Customer service;
- Recruitment;
- Etc.
In addition, you must keep in mind that a visitor who fills out your form wants to exchange with you. For this, you must make sure to provide each of them with personalized and relevant answers.
What is the interest of a contact form for a website?
Receive targeted and quality information
Unlike an email, a contact form has the privilege to be configured according to your needs. Thus, you can choose the information you want to receive. This is done by defining precise fields that can be mandatory or not, free or not, and that the visitor will have to fill in.
Even better, you can set up different forms in case the information has to be sent to different departments of your company.
Reduce spam
Currently, the security of personal data is a real problem on the Internet.
Therefore, the creation of your contact form is a major asset insofar as you are no longer obliged to display your emails on the pages of sites or blogs.
Integrating a contact form: best practices Evaluate your needs and define the right tool
To have a custom form, you must ask yourself some questions before starting its technical implementation. These questions include
- Who is the contact form for?
- In what form should the contact form appear?
- What information can it collect?
- Will it be necessary to hire a developer?
Taking the time to think about and answer these questions will allow you to choose the right way to integrate your form and make the next steps much easier.
Destination email address
The information collected by your contact form must arrive somewhere. Therefore, I invite you to define a specific email address for receiving data or questions from your visitors.
By doing so, you improve your performance since you only get the messages coming from your users and each notification tells you to get back to them
Otherwise, you risk being overwhelmed by other messages and therefore sometimes miss out on some important emails. A fact that can be detrimental to your business if it is repeated.
On the other hand, you can relieve yourself of this function by assigning the form to a specific person or department in your company, such as the communications, sales or customer service departments, etc.
Fields to be filled in
The contact forms generally include the following parameters:
- First and last name;
- The email address;
- The phone number, ;
- The subject ;
- The free text field.
You can make some fields mandatory or not, free or multiple choice. But I recommend you not to ask too much from the users who will be quickly put off if there is a lot of information to provide. To increase security, I also suggest you to think about adding a captcha.
Reassure visitors
When users click on the “Submit” button, they wonder if the form is really sent or not. It is therefore important for them that you provide an answer to this question.
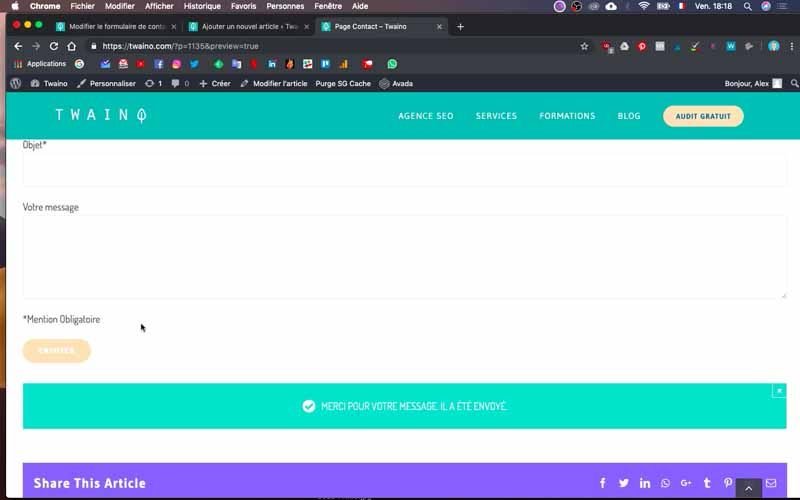
Therefore, include a message after each submission, such as: “Thank you, your message has been sent”. It is also possible to add a response time, but in this case you must be sure to respect it.
Highlighting the form
A contact form must be easily accessible once on your website. Usually, it is already on the homepage in the main menu or sometimes in the sidebar depending on how the site is configured
It often appears as a link “Contact us” or simply “Contact”. In order to be accessible from any page or step of the navigation, you can integrate it in the footer of your website.
Integration and technical aspects
To add a contact form to a website, you don’t need to be an experienced developer. For example, users of the WordPress CMS have the possibility to use the contact form included in the theme they have chosen.
If not, they can make use of pulgins like “Contact Form 7” which is very popular because of its ease of use, reliability and free of charge.
Contact form 7 step-by-step installation and setup by yourself
So that you have a clear idea of how to do it, I will proceed to add the contact form on the site of my SEO Agency Twaino.com, using of course “Contact Form 7″. I do the steps ”step by step” and with the video that accompanies the article, you can easily do the same for your website. Let’s go !
1) Log in to the “Admin” account of your site
To begin, you must first connect to the administrator account of your website. To do this, add to the URL of your website “…./wp-admin”. On the interface that appears, fill in the boxes with your identifiers.

2) Install “Contact Form 7
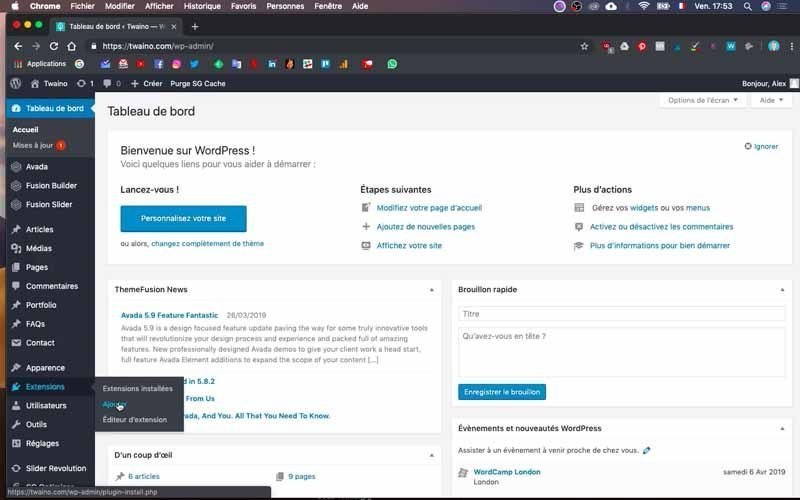
If you don’t have the “Contact Form 7” plugin yet, you can simply install it. But to check first whether you have it or not, go to the “Extensions” section on the left sidebar. In the menu that appears, click on “Installed Extensions” and go through the list to quickly check if you already have it.
If you don’t, click once more on “Extensions” and now on “Add”. Then, in the search bar at the top right, type in “Contact Form 7”.
You will quickly find it in the results as it has its name and a picture of a mountain. Click on “Install” which is in the top right corner of its frame and just above “More Details”.
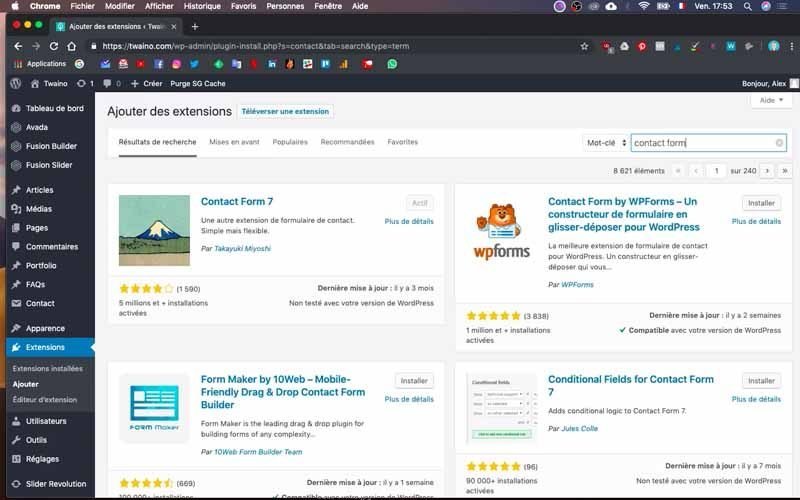
At this point, I would like to draw your attention to the number of users of this plugin, which exceeds six million and is indicated just below the star ratings. This clearly shows its popularity and reliability.
After the installation, which only takes a few seconds, you will find a new section in the left sidebar called “Contact”.
3) Go to “Contact
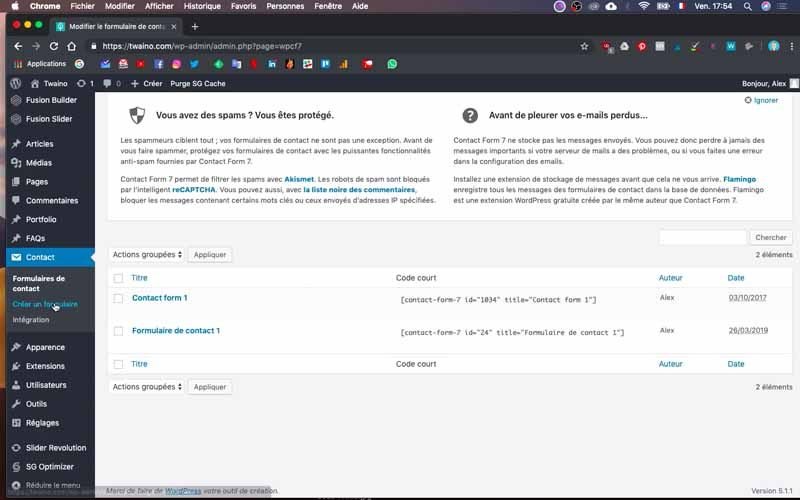
Click on this new section to see the different options it offers. Scrolling down, you will see the form that exists by default and was created automatically. But I’ll give you the steps to do it yourself from scratch.
4) Create a form
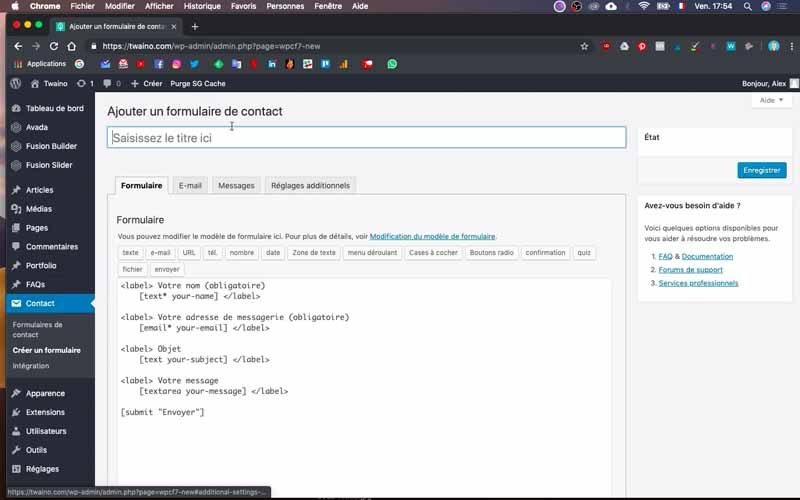
In the “Contact” section, you will find the option “Create a form” which you will click on. You will then have the page “Add a contact form” on which you will first give a name to your form.
I call mine “Form 1”. Then there are the different windows such as :
- Form: which helps you to configure your form;
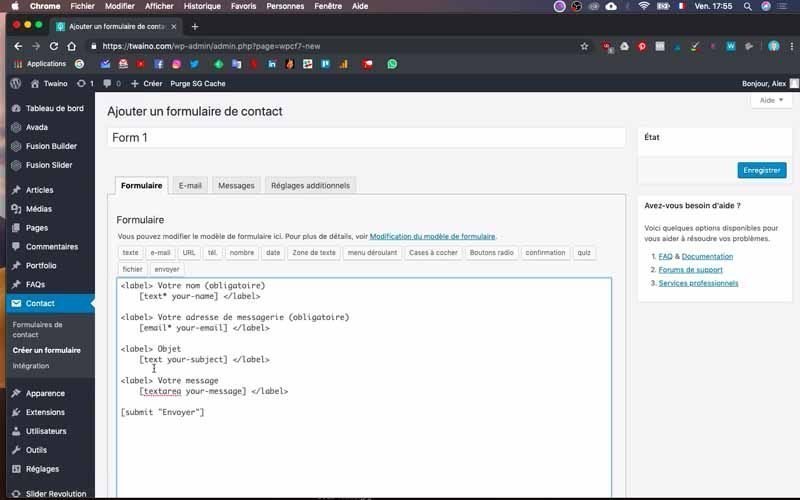
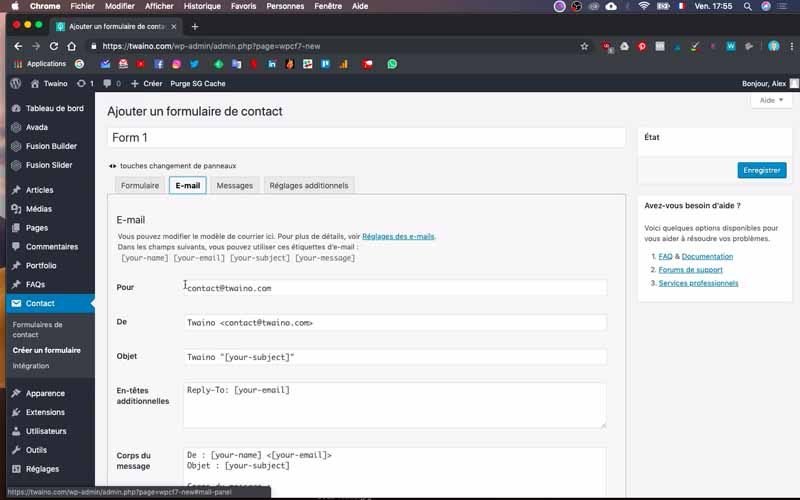
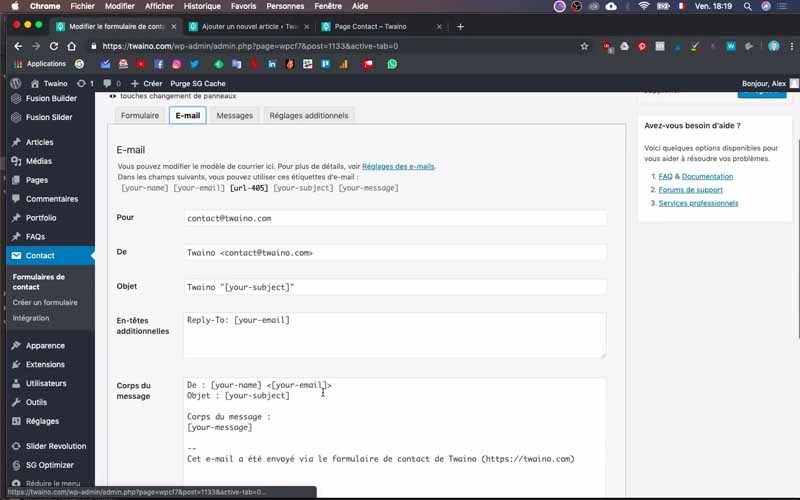
- E-mail: this is the space for setting up the incoming e-mail and is often well configured by default. For that, I do not necessarily modify it;
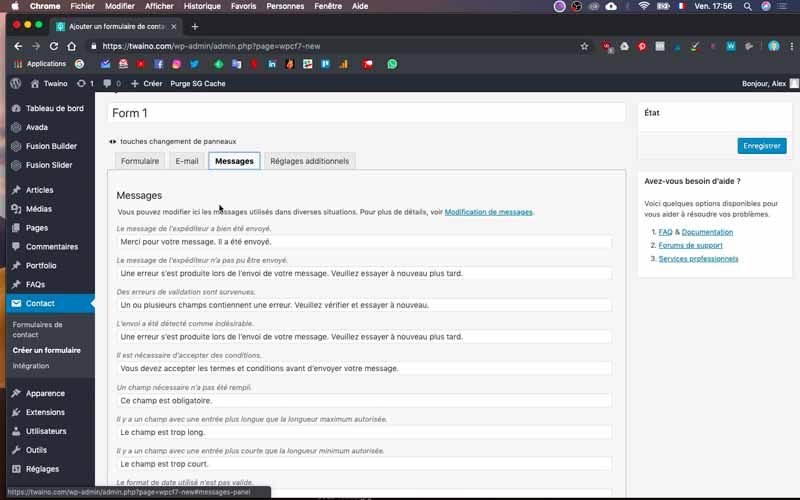
- Messages: These are the messages that are sent by default if, for example, a visitor forgets to fill in a mandatory field or fills in his email incorrectly.
- Additional settings : it is used when you want to go further in the settings instead of being satisfied with a simple contact form.
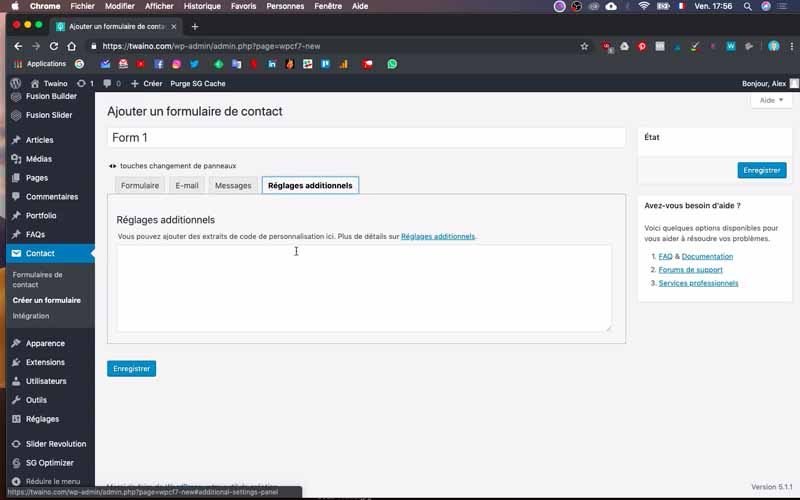
Without making any changes other than adding a name, I can save it.
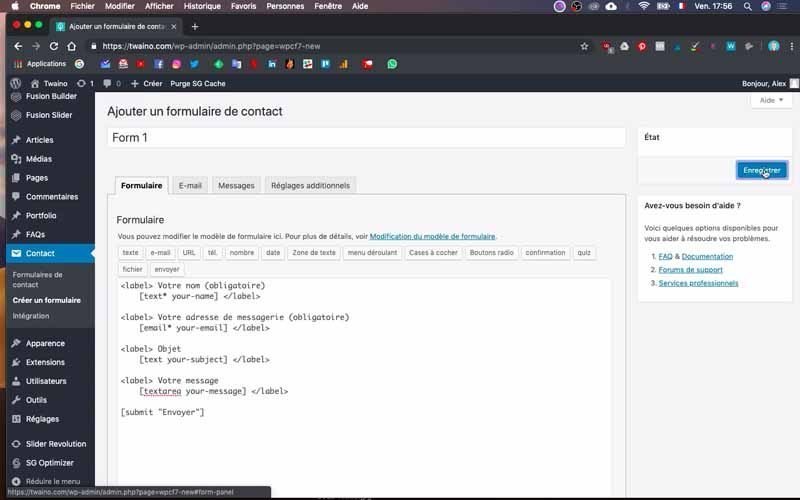
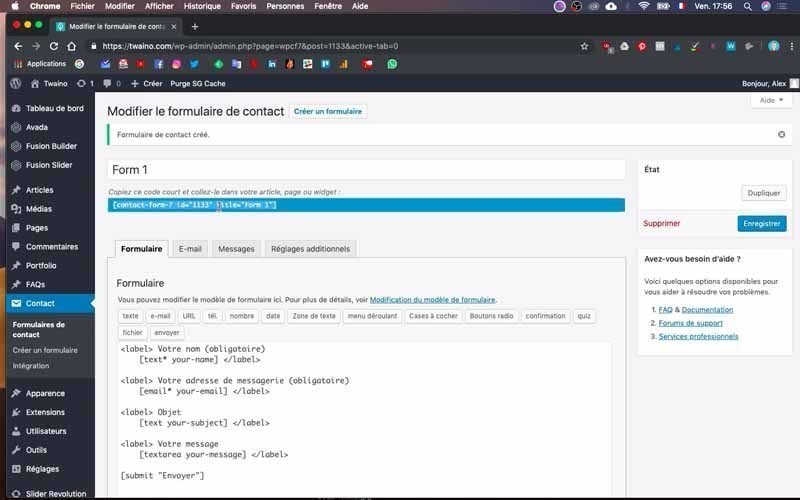
Once the registration is done, you will notice that a code will appear just below the name of the form. This is very important and will be used in the following steps.
5) Check the form in a new article or a new page
Copy the previous code and then go to the “Article” section and click on the “Add” option
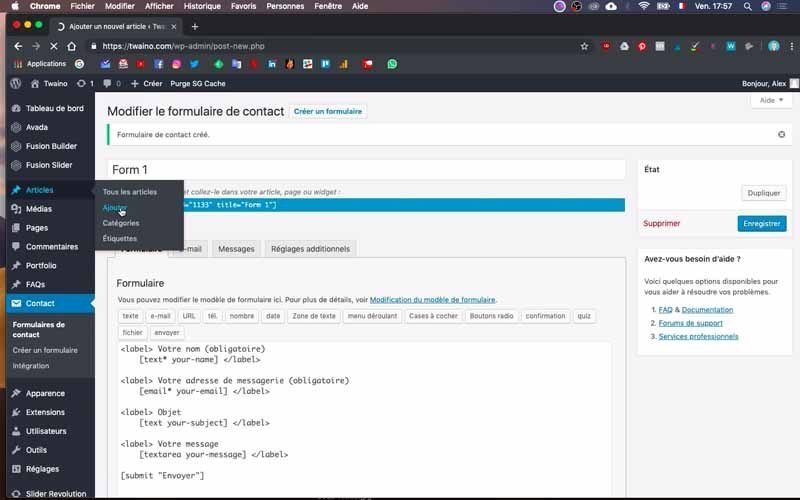
For greater ease in the ”back and forth” between the “Contact” and “Articles”, I will create a new browser window to properly configure the page “Add a new article”.
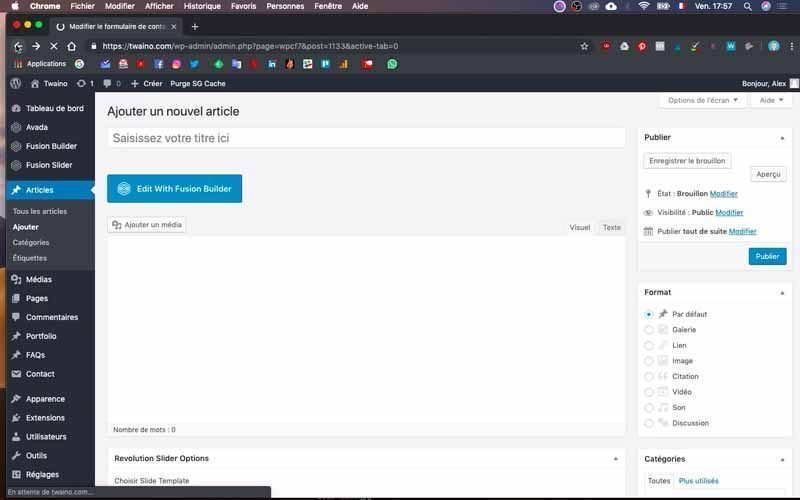
Give a name to this new article in the space indicated
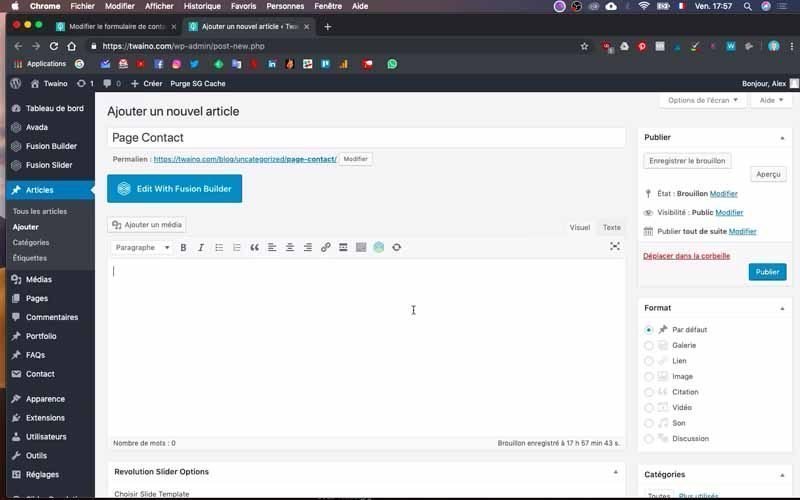
But, before you paste the code into the text field, click on “Text” which is just to the right above the field in question and next to “Visual”. Once this is done, paste the code.
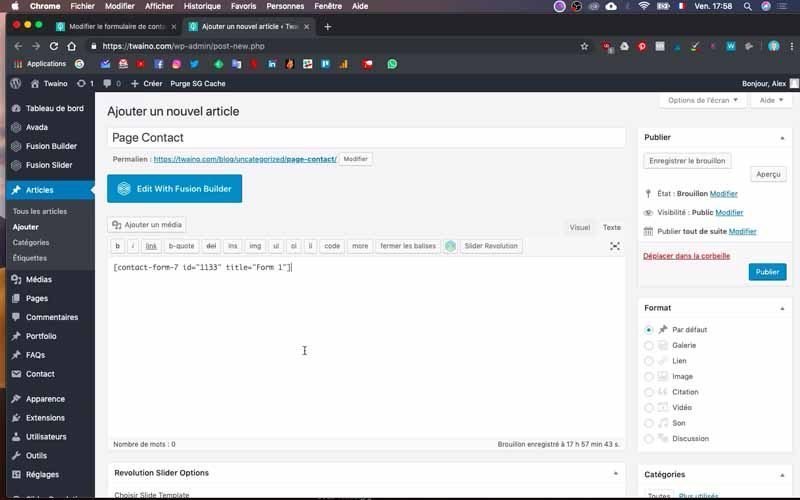
You can already press the “Preview” button which is located in the “Publish” menu on the right sidebar
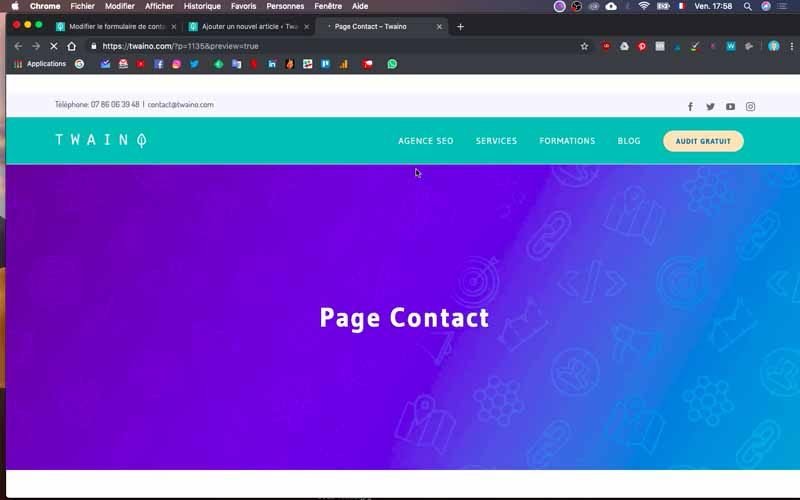
You will see that your contact page already includes the elements:
- Your name (Required) ;
- Your email address (Required);
- Subject;
- Your message;
- Send
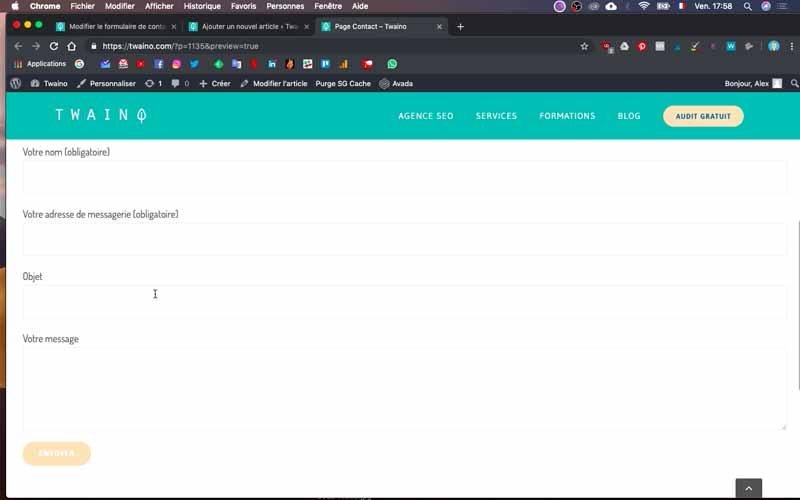
All these elements are included in the “Form” window of the “Contact” section. Now, I will show you how to :
- Modify them :
- Add them ;
- Delete them if you wish.
This will allow you to create a contact form that will be adapted to the profile of your activity or your needs.
6) Go to the “Form” window
To customize the form, go to the “Form” window of the “Contact” section we saw earlier. First of all, note that each section always begins with and ends with . As you can already see in the text field with the different parts of the contact form.
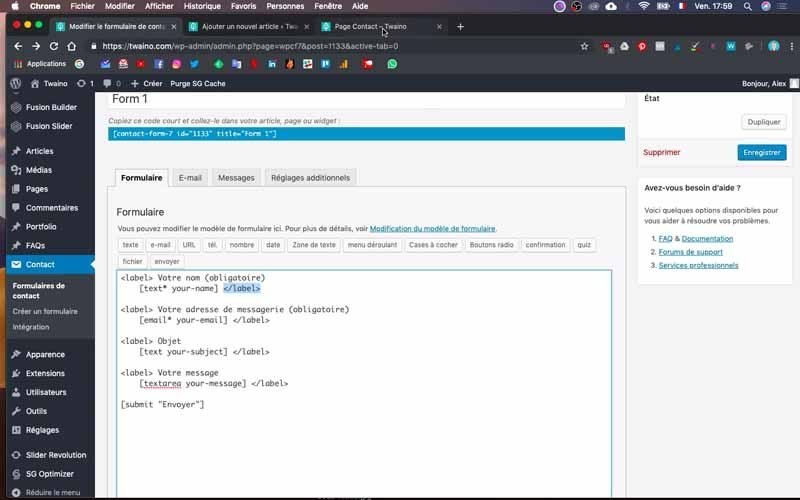
In the center you have the elements that can be modified. If you want to put a small star (*) in place of “Required” which is in parenthesis, just delete “(required)” and put instead the star as I do in the video
To see the result, click on the blue “save” button and then on “preview” in the second navigation window of “Add New Article”. You will then be directed to the contact page where you will notice that there is a small star instead of “(Required)”.
Note that it is the part that comes just after at the top that you can modify as you wish. The bottom one has a bit of coding to do, but we’ll use the buttons right at the top of the text field to create them.
7) Add a new section to the form
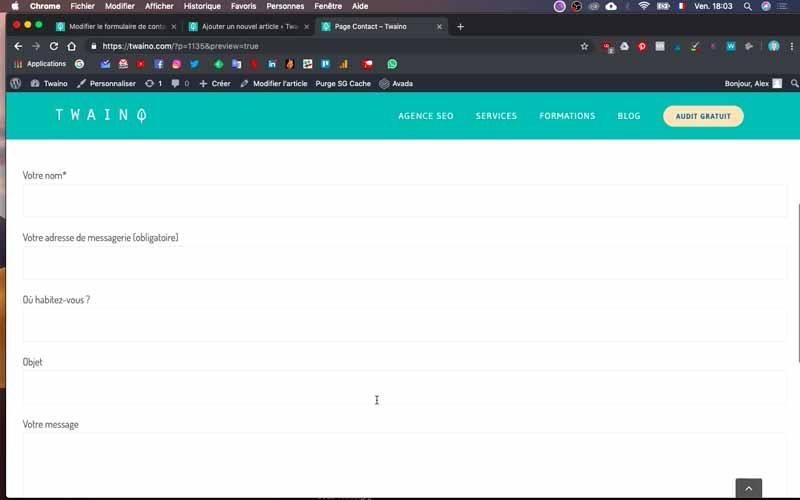
To add a new item or question to the contact form, just copy one of the existing codes and paste it into the position of your choice. I’m adding the question “Where do you live”.
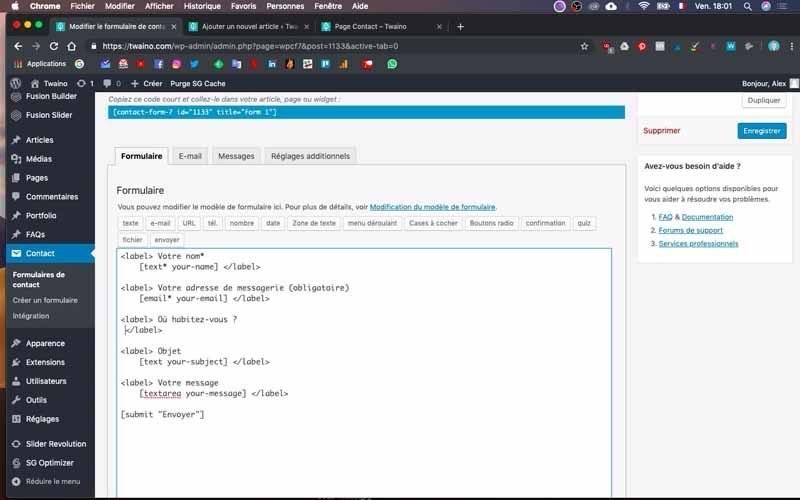
To do this, I copy and paste and edit the easily editable part at the top and just after . Then delete everything at the bottom before
To create the tag for “Where do you live?”, I click on the “Text” button that is right at the top of the text field. A dialog box appears to allow me to make the settings.
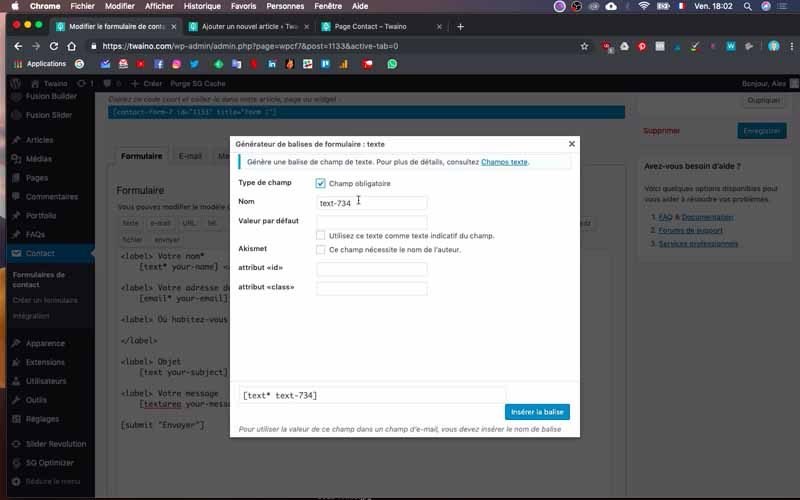
Note that this is actually the ”box” where the visitor can enter text to answer the question.
8) Set the tag
In the dialog box, there are several elements such as first of all making it mandatory. This obligation leads users to have to fill in this part, otherwise they will get error messages telling them that the form has not been sent because the field in question is mandatory.
To do this, you just need to check it off. You can then give a name, but I typically never change it. However, I will indicate a “Default value” such as Paris, Marseille, Lyon or any other city, to indicate to users what type of information they should fill in. Then check the following items according to what you want to obtain.
Once the configuration is done, click on the blue button “Insert tag” and save to create a preview as we did in the previous step. As you can see in my case, I do have “Where do you live?” on the contact page of my website with the response box reserved for it.
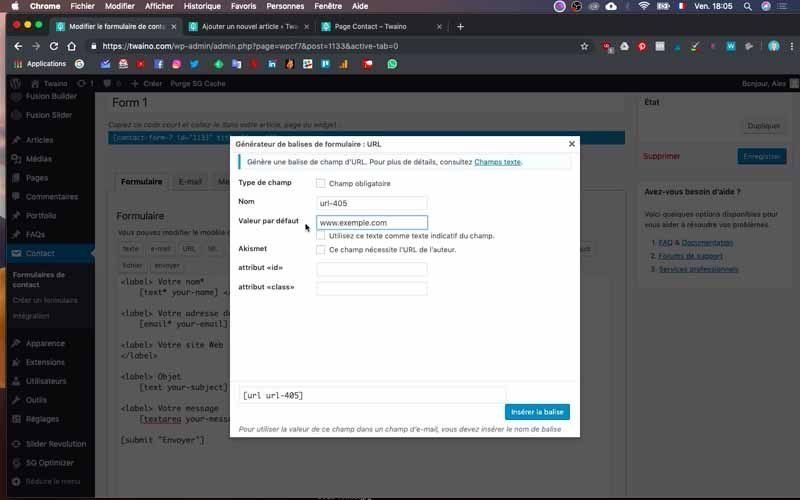
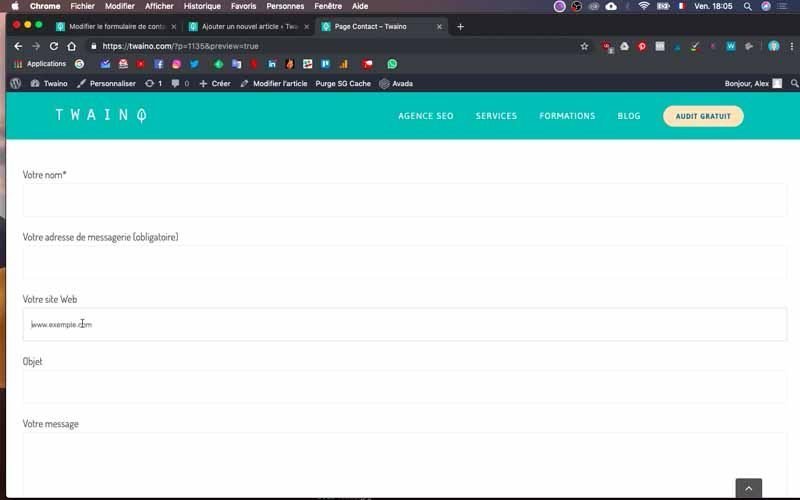
I’m going to add one more section to my contact form. It is to ask for the website URL of the users who want to contact me. To do this, I first place the codes and . Then, I write the mention “Your website ?” just after the first code. I go to the next line and click on the “URL” button located just above the text field. The configuration box opens and this time I fill in the “default value” with www.exemple.com. I click on “insert tag” and save to preview.
As you can see, I have the “Your website?” section that appears on my contact page.
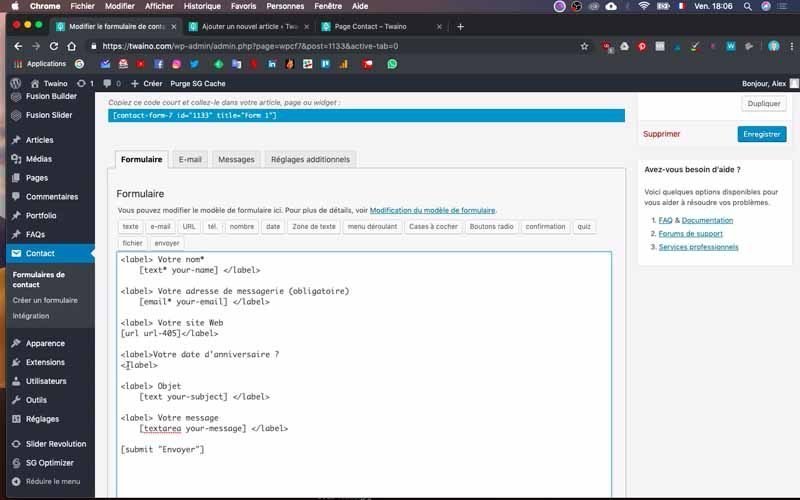
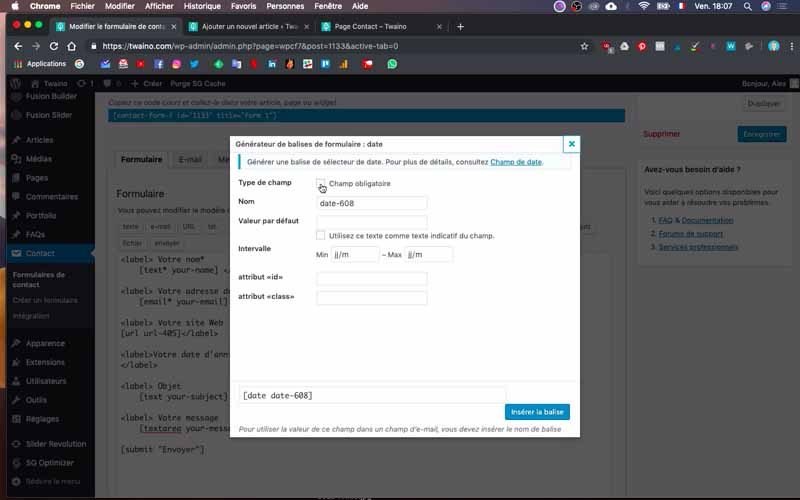
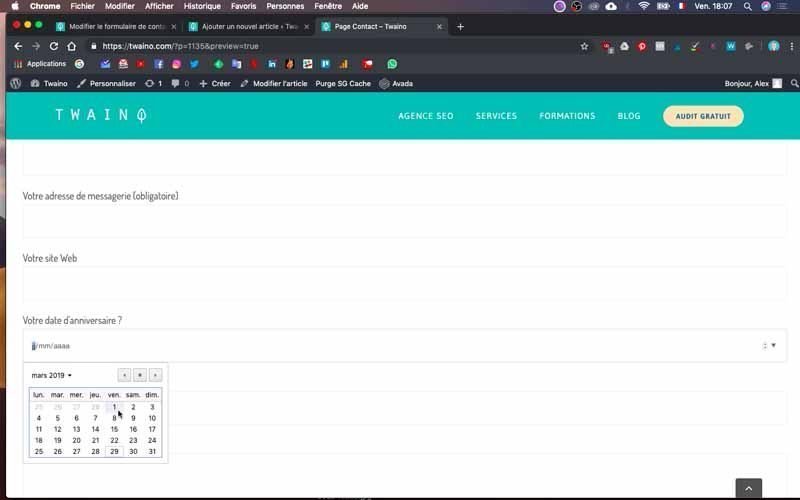
I proceed in the same way for “Your date of birth”, this time taking care to choose the “date” button for the tag.
In short, in addition to the start and end codes, you now know what to do if you accidentally delete all the data in the text field. Just click on the right button to insert the right tag. For email, there is the right button, as well as phone, URL, etc.
9) Add a drop-down menu
To offer users a list of choices through a drop-down menu, you will proceed in almost the same way, except for the configuration of the tag. In my case, I’m going to create a dropdown menu for the question: “Do you want to get more traffic for your site?
After entering the start and end code and the text, I now click on the “Dropdown Menu” button
Fill in the “Options” field, making sure to go to the line for each possible answer. In my case, I enter “yes”, “no” and “a little”.
Note that you can offer the possibility of checking multiple answers with the “Allow multiple selections” option, which you can simply check or uncheck if you don’t need it. I click “Save” and then I will create a preview where I can see my new question and the three options set.
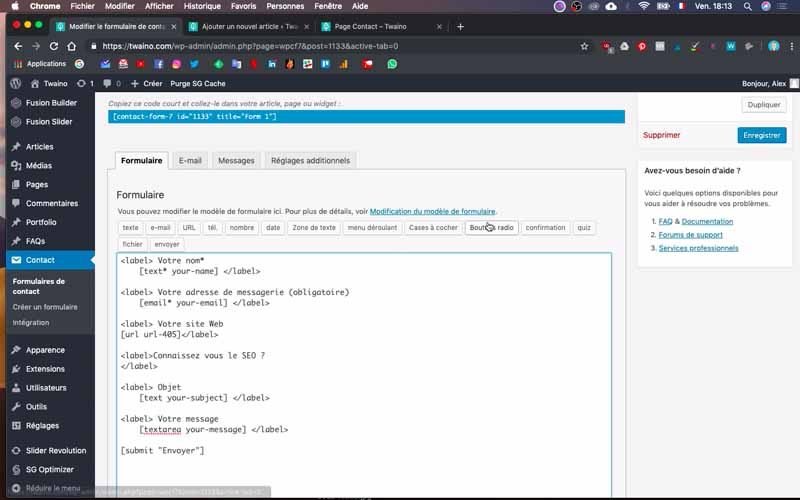
On the other hand, you may have noticed that there are other buttons including :
- checkbox: which offers almost the same functions as the previous one except that you can integrate exclusivity for certain options. From there, if you check an option, others will not be accessible.
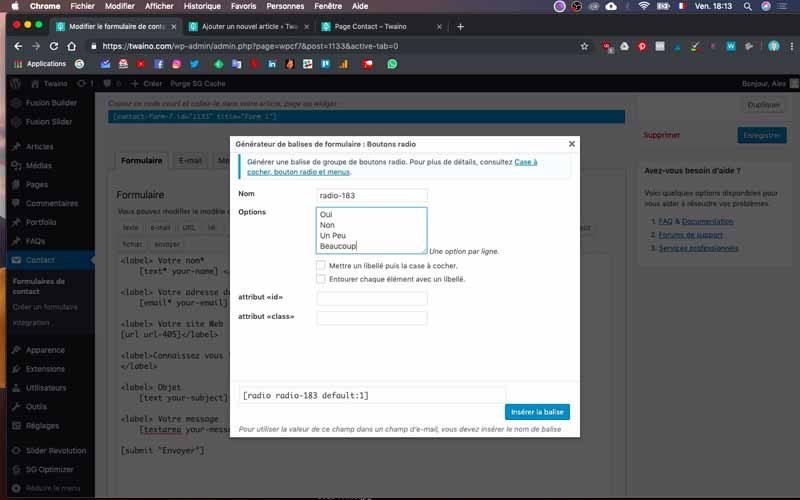
- Radio button: which offers the user the possibility to check the option he wants thanks to dots as shown in the video.
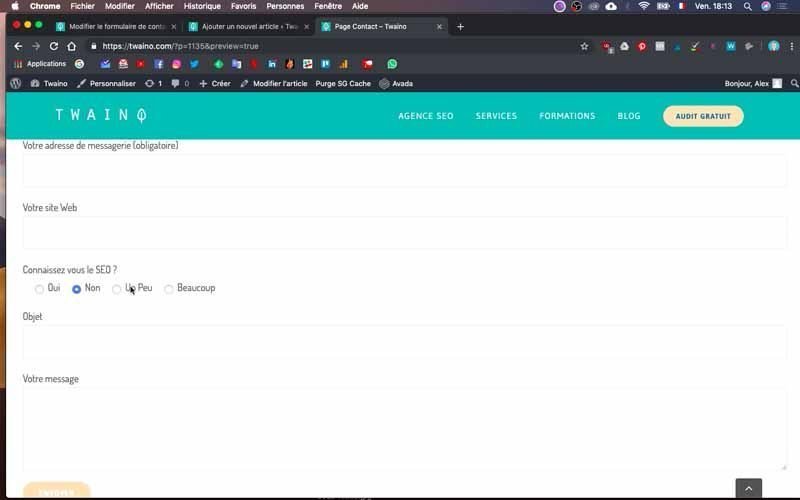
- Confirmation: this tag allows you to have confirmations such as the acceptance of the terms of use where it is necessary to check.
- Quiz: which allows you to make questionnaires, but this option, I do not use it since it is not the best way to do it according to me. Indeed, there are other tools that are much more powerful to make good questionnaires.
10) Collect files with your form
You have the possibility to collect files through your contact form when you have specific requests like “Your CV”. In my practical case, I will create it and add a part where users can directly upload their CV.
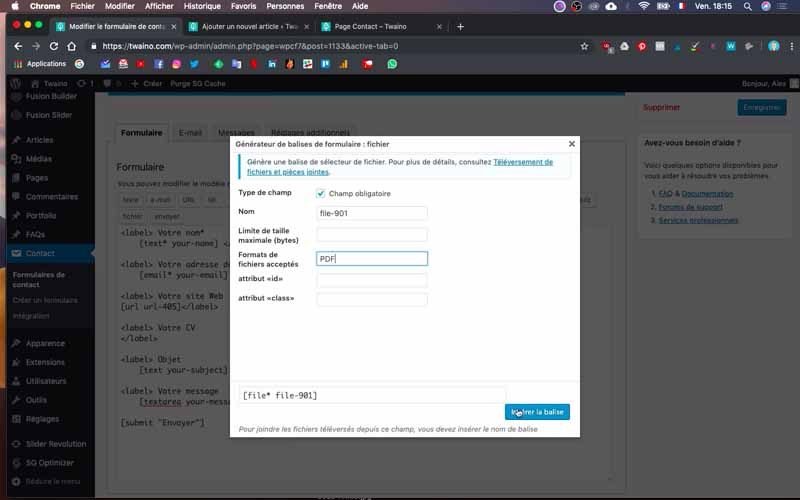
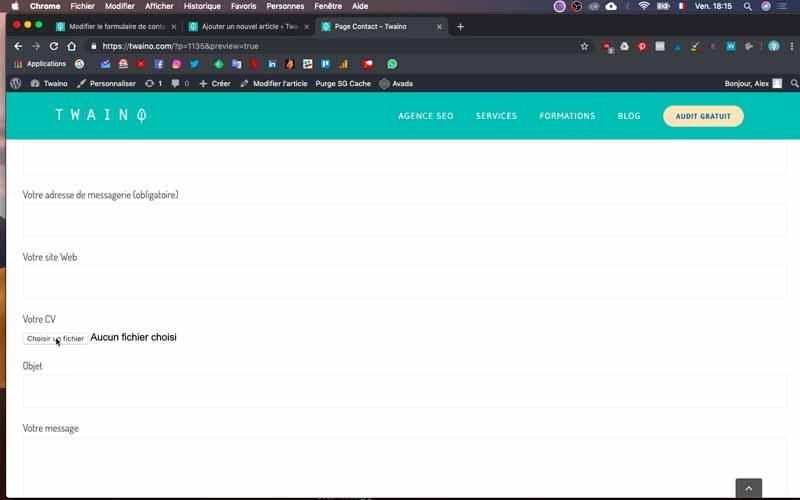
After putting the start and end codes, I write “Your CV” and this time I click on the “File” button. I set the tag by checking the “required field” and enter the PDF format as the one I accept. Keep in mind that you make the fill in as needed.
I then create a preview and have “Your Resume” with the “Choose a File” option.
11) Configure the “Send” button
In the last position, you can modify the “Send” button by replacing it with another wording of your choice.
12) Check that your form is working properly
Once you have completed your form, quickly check it by filling it in yourself. Also take a look at the message that appears when the form is actually sent.
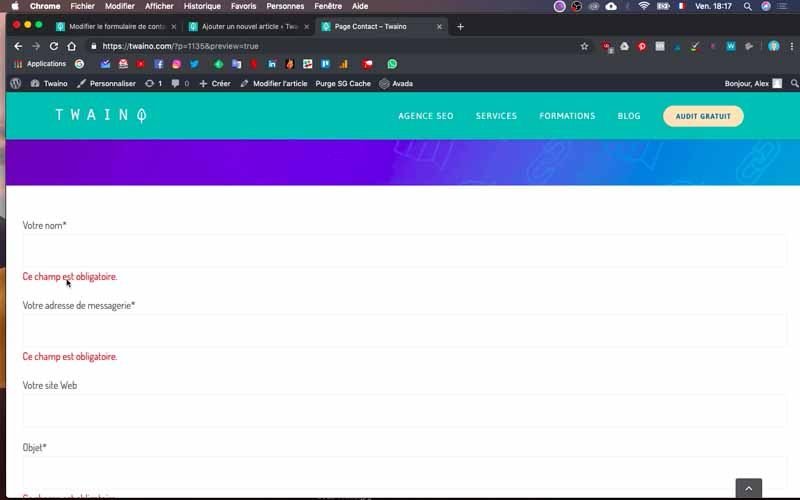
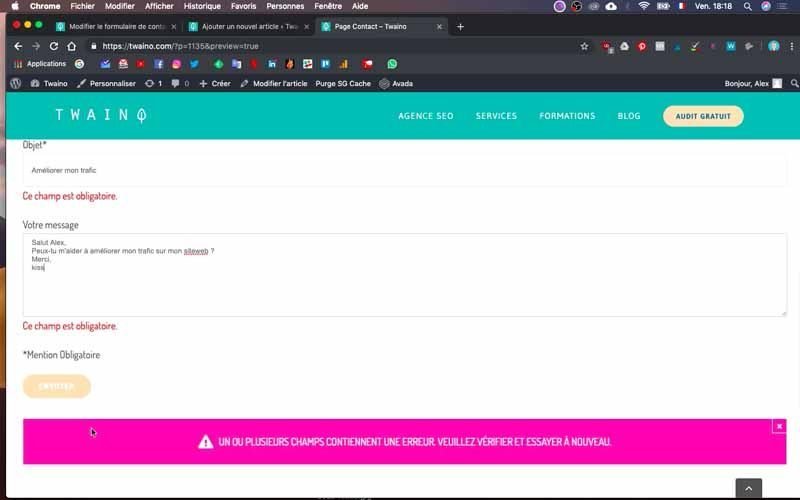
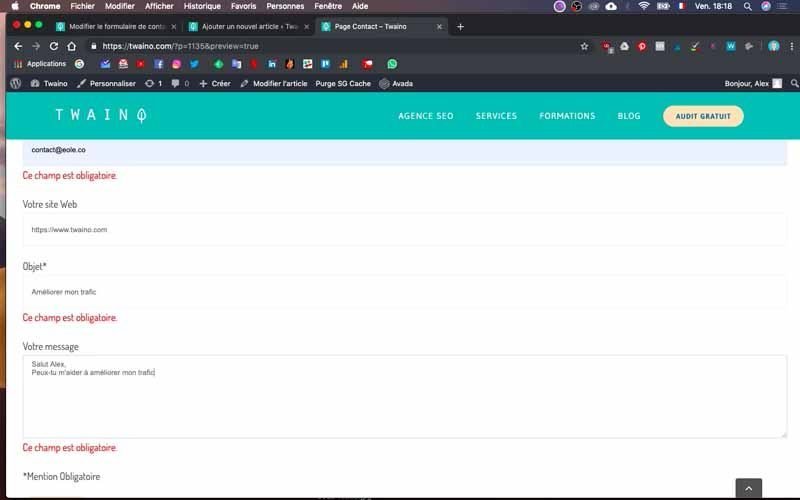
Then go to the mailbox that you indicated when configuring the form to check if the message has really arrived.
Note that if the way the message is displayed does not suit you, you can simply go to the “E-mail” window of the “Contact” section to make the appropriate configuration.
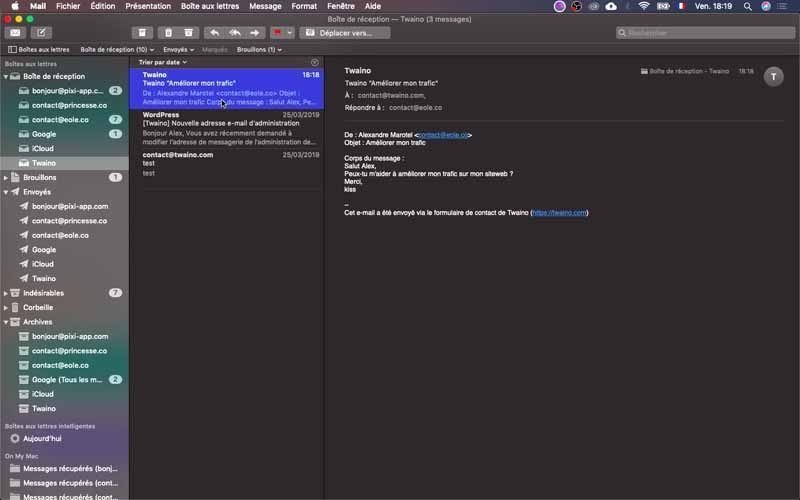
But this works fine by default, so I hardly ever touch it.
13) Integrating the contact form on my homepage
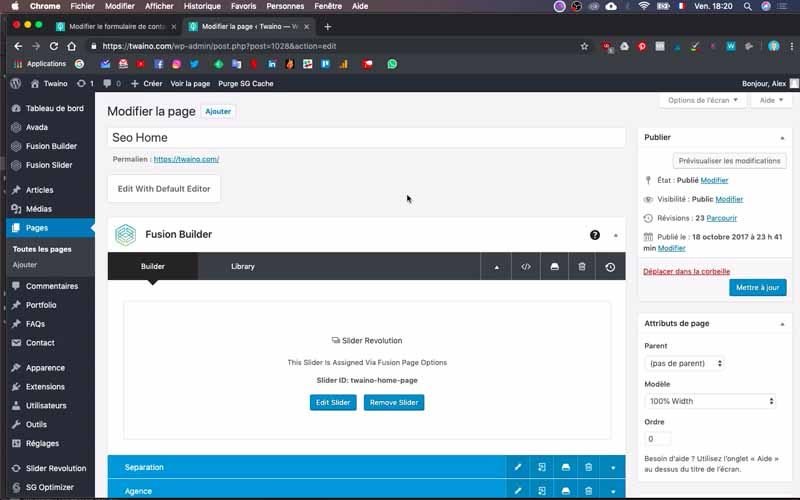
Now that my form is correct and that it contains the information I want, I can integrate it on my home page of my website, Twaino.com. To do this, I will go to the “fusion builder” of my theme “Avada”.
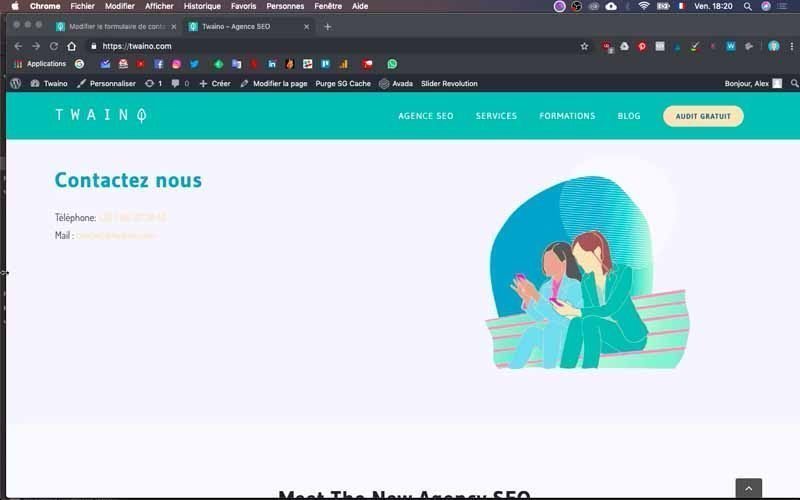
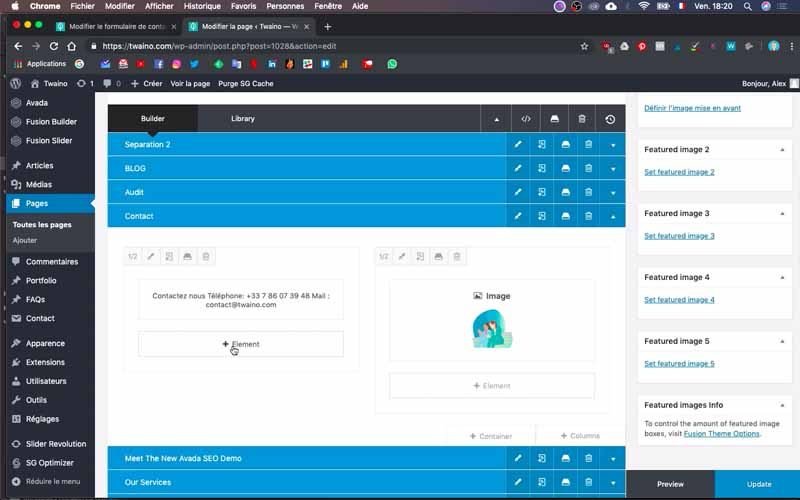
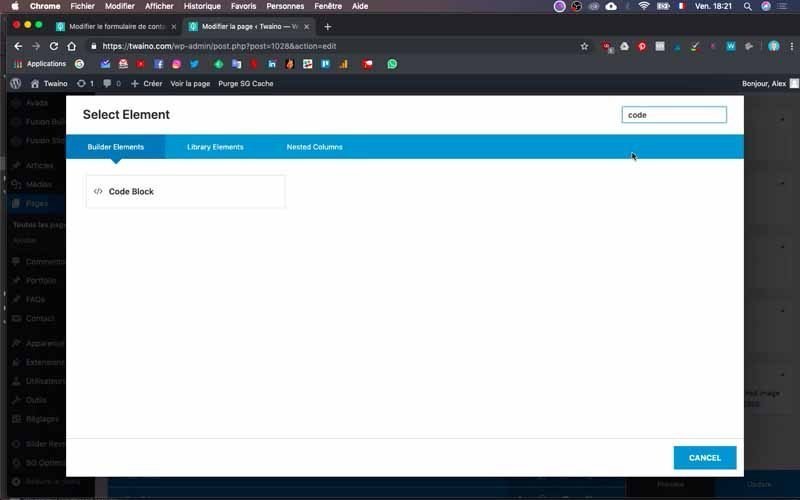
To do this, go to the page in question and click on “Edit Page” which is on the horizontal bar at the very top. On the configuration interface you have, scroll down to the “Contact” menu and then click on “+ Element”.
Then you have a space where you will search for “Code Block” in the search bar
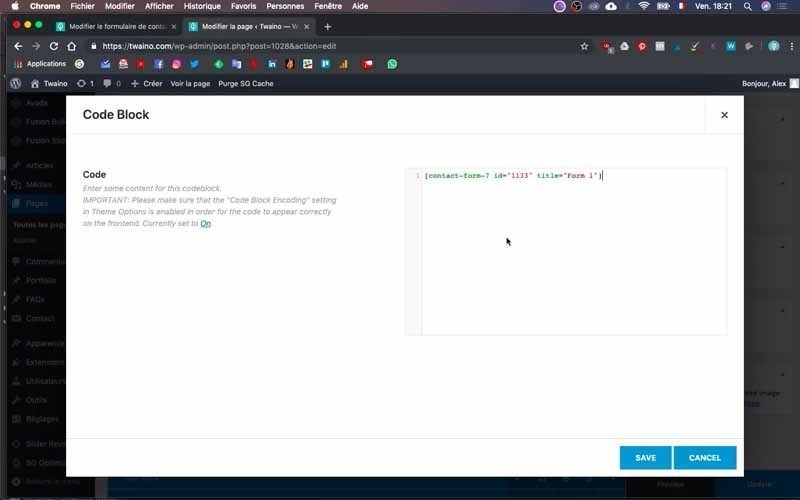
Select it and then paste the code from the “Contact” section that we used to set up the “Articles” section and mentioned in step 4.
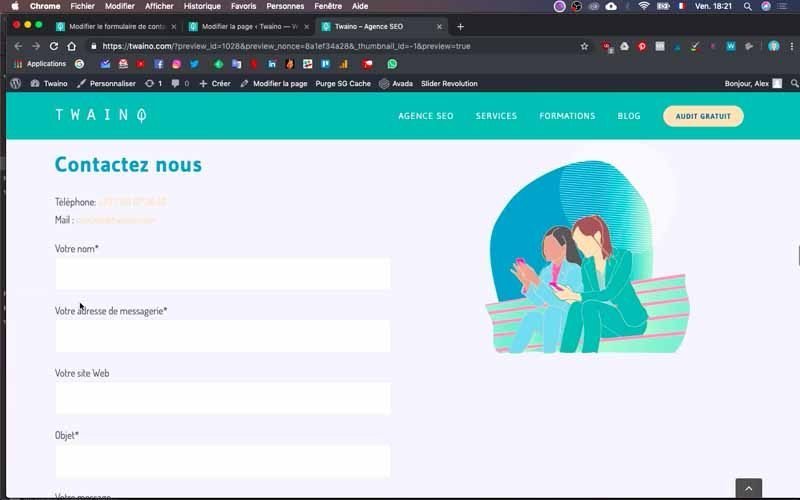
Save, refresh and preview to see how the form looks on the page.
Congratulations! We have just installed and configured the “Contact Form 7” plugin.
Conclusion
After browsing a website, many Internet users often find themselves with questions to which they would like to have answers. These may be questions about the various products or services offered or requests for personalized services. For this, it is very important to offer them the possibility to contact you directly from your website. You need a form to receive in addition to their messages, the minimum of information to be able to make them a return. To do this quickly, easily and for free, I recommend the WordPress plugin “Contact Form 7” which is not limited to contact forms. But the steps above already help you to get a contact form tailored to your needs. The other uses of this valuable tool will certainly be the subject of other articles and videos if you wish.
On that note, see you soon!

