You have decided to start a blog, congratulations! I assure you that it is a great decision you have made. As a proof, 55% of marketers believe that creating blog content is their prioritywhen it comes to inbound marketing. So, having a blog is a strategy that works, but you still need to be able to write quality articles to feed it and then publish them. I have developed this guide to give you the best tips and tricks to help you publish your first article in the best way. Indeed, I will show you in this article and in the associated video, the steps to successfully integrate your first blog post in your website.
Creating a Blog post
In this video, I show you all my tips to create your first blog post on wordpress:
Posts and Pages: What are the differences between the two?
Before continuing, I find it interesting to go back over these two notions that sometimes lead to confusion.
WordPress posts or Blog posts
On WordPress, an article is linked to a certain timeline, so it automatically moves to the top of the list of other articles on your blog if it has just been published. In the same sense, old articles become less and less visible in the list when you regularly add new blog posts.
However, this definitely does not mean that your older posts are not getting traffic. In fact, they will continue to be indexed in Google, and as a result they will be read and will benefit from good SEO.
Also, since articles have a publication date and time, they can be syndicated through an RSS feed to inform readers of updates.
Creating quality articles is a good way to stay in touch with your audience, for that you must first succeed in collecting emails from your visitors.
In addition, the articles have a “comment” feature that allows readers to share their thoughts, analysis and extend the conversation with you. This option can be activated or deactivated at will.
Another difference between a blog post and a WordPress page is the temporality. Indeed, a blog post is considered to be suitable to answer a “temporary” need whereas a WordPress page will have a “fixed and permanent” content.
WordPress pages
In principle, pages are static and there are several examples such as :
- The “About” page;
- The “Legal” page;
- The “Privacy Policy” page
- The ” Contact ” page
- Etc..
Unlike posts, pages are timeless, even if they are dated in the WordPress data. In fact, if you have pages like the ones listed above, you’ll agree with me that they won’t expire, even if you’ll have to update them from time to time. For example, a “Contact” page may remain intact for several years, while a blog post may be completely obsolete.
Moreover, pages are not included in the RSS feed and cannot be commented and/or shared, unlike articles.
Articles vs. Pages: The differences
| Articles | Pages |
|---|---|
| Chronologically sorted | Timeless |
| Allow comments | No comments |
| Share button on social networks | No share button in general |
| Featured author | Author hidden |
| Not present in the menus | Present in the menus |
| Classifiable by categories and keywords | Hierarchy logic |
Best practices for publishing your first article
The first article opens the door to all the other articles that will follow, so it is very important in that it will allow you to establish an editorial framework. In fact, this is your first step towards the success of your blog, so make sure you think carefully about the format, tone and style you want to use.
Produce a quality content and a publication plan
Unless you are not aiming for blogging success, I encourage you to take the time to develop a good content creation process. Indeed, there are more than 2 million blog posts per day in the world and to be visible among this lot, it is crucial to adopt a good strategy from the start.
In this regard, I have written an article that covers the subject extensively and also gives you guidelines to maintain a publishing rhythm over time. As a bonus, you can also check out this article, which deals with tips and methods to monetize your blog.
Optimizing the referencing of your article
To ensure the fact that your article can benefit from a good referencing on search engines, there are some points that it is very wise not to miss. It is not only a question of having a structure and thus an appropriate form, but also a precise content, with a quality content. but also of its content.
I will soon publish a full article on the subject, but for the publication of your first article, you can already consider points such as :
- Determining your main keyword ;
- Inserting the main keyword in the title;
- Writing a rich and dense content;
- The use of h1, h2, h3 tags to indicate the title and subtitles of your article;
- Etc..
Improve your SEO with a plugin : Yoast SEO
Fortunately, WordPress offers plugin integration to enjoy many features. To ensure that your article is well referenced, I recommend you to install this plugin.
Indeed, Yoast SEO will offer you a content analysis of each article and page as well as a snippets configuration. To this extent, you will be able to edit the best titles and meta descriptions for search engines and social networks.
Moreover, this plugin gives you access to useful information about :
- Text density ;
- The outgoing links ;
- The tags ;
- The presence of the main keyword in the title, the meta-description, the URL..
Once your article has been well written and well optimized for SEO, you can move on to publishing it. I will have the opportunity to show you all the useful features of Yoast in a future article.
Publish your first blog post: Step-by-step steps to do it yourself
To make the steps easy to understand, I will use the creation of my first article on the blog of my agency Twaino.com.
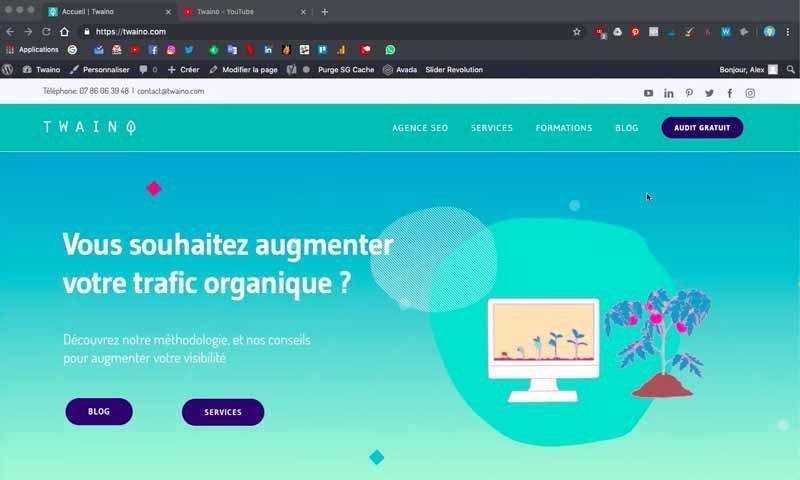
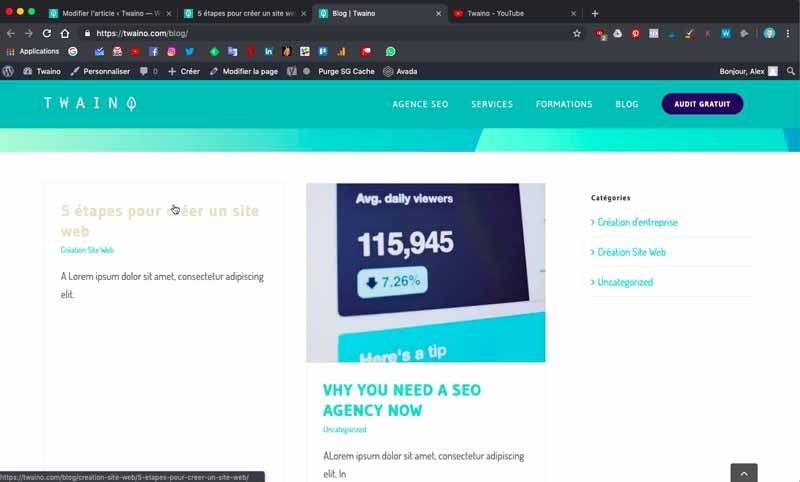
Indeed, for the moment on the “Blog” page of my website, I only have the default articles coming from the demo theme that I had the opportunity to install.
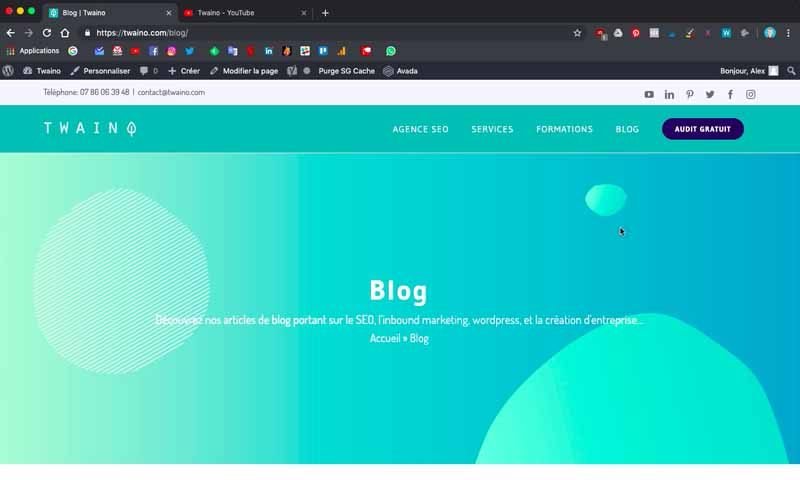
Note also that “Avada” is the theme I installed on my website and it offers me the plugin “Fusion Builder” with which I will proceed to the various modifications.
That being said, the first article I want to add is entitled: “5 steps to create a website” and to publish it, I need the following:
- The background for the page;
- The title ;
- The text of the article ;
- The visuals: images, videos, illustrations..
On that note, let’s go!
1) Log in to your administration area
In order to add a post to your website, you will first need to access the WordPress console.
Therefore, you just need to add the code “…./wp-admin” to the URL of your website and validate in your browser. At my level, my URL becomes “https://twaino.com/wp-admin”.
A connection page is then presented and take care to fill in the boxes with your identifiers. Validate everything, which allows you to access the dashboard or administration space of the website.
2) Create the title of your article
From the “Blog” page of your website, click on the “Create” window preceded by the “+” symbol and located next to the “Edit Page” window.
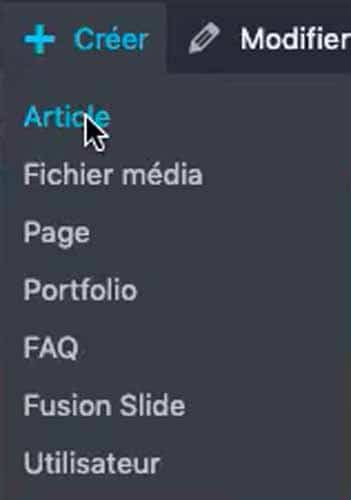
Then select the first option “Article” in the menu that appears.
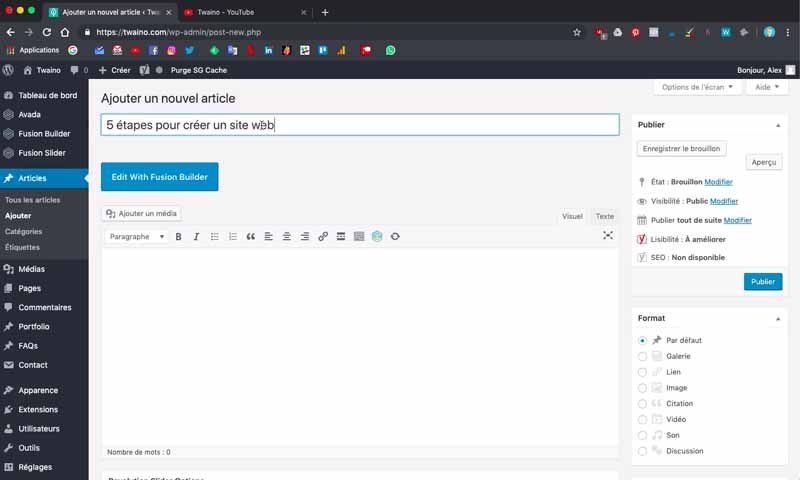
You are then taken to the article configuration page and to create the title of your article, you just have to type it in the first frame.
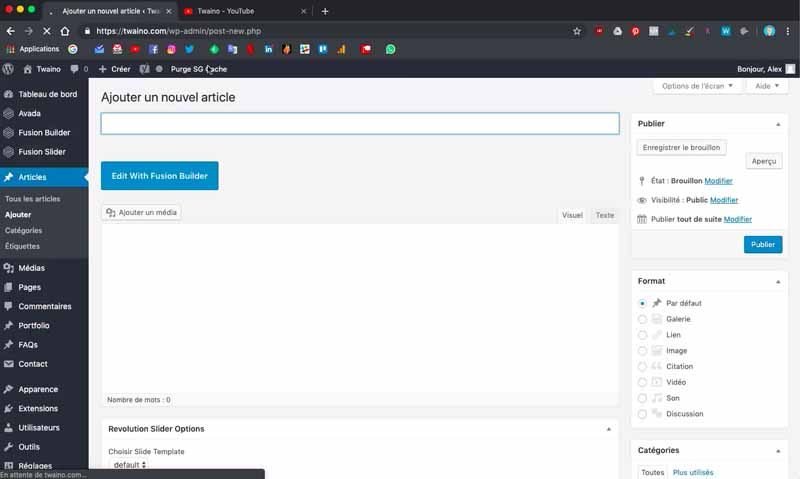
Note that this is the text that will be used in the permalink. At my level, I write “5 steps to create a website”.
3) Choose the category of your article
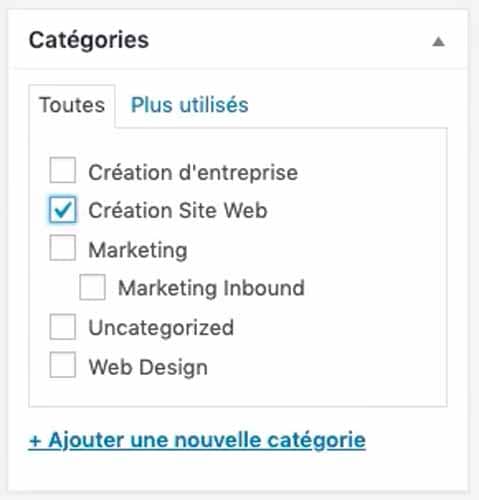
At this level you can already choose the category of your article. Mine is obviously part of the creation of website and I check in this case “Creation Website” located in the frame of “Category” below that of “Format”.
4) Save and publish your article
It is useful to publish your article early in order to appreciate the results of your changes. But you have to be careful in case you already have traffic on your website.
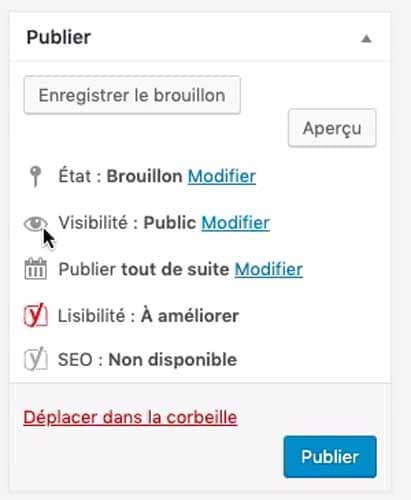
Indeed, you can make your article private in order to make all the necessary changes before making it available to your audience afterwards. However, in case you don’t have any traffic, you can not do it as it is also my case now.
To do this, go to the first “Publish” box and simply click on “Edit” which is located at the eye icon of the “Visibility” option.
In the menu that appears, select “Private”, which prevents your visitors from having access to it for the moment. Then click on the blue “Publish” button just below the frame.
This means that only you have access to the article, but don’t forget to make it public as soon as you’re done or according to your schedule.
5) Load a template for your article
I had the opportunity to create a template or a model for my articles, which was the subject of another video. So in order not to go through the process again, I’m going to load the template in question to use.
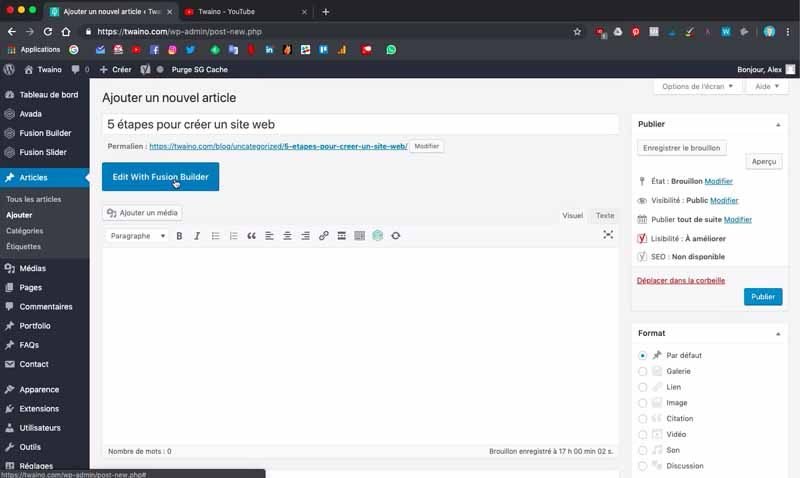
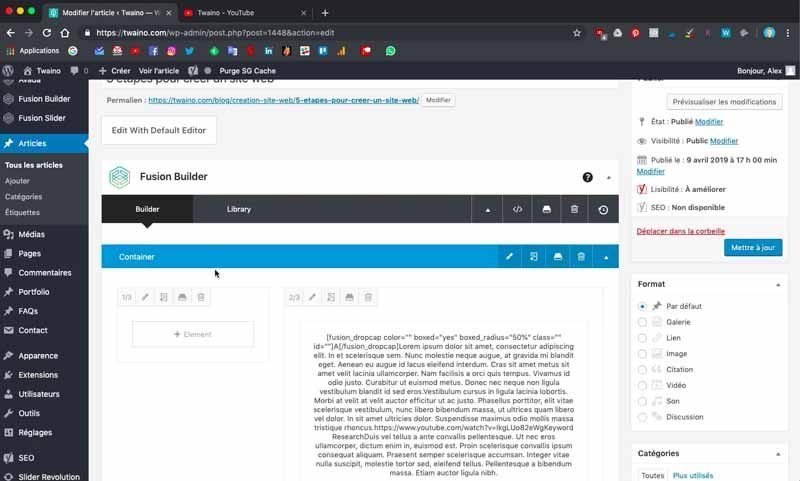
Just below the title of the article you just entered, you’ll find the blue “Edit With Fusion Builder” button that you’ll click to get an interface that will allow you to configure your article.
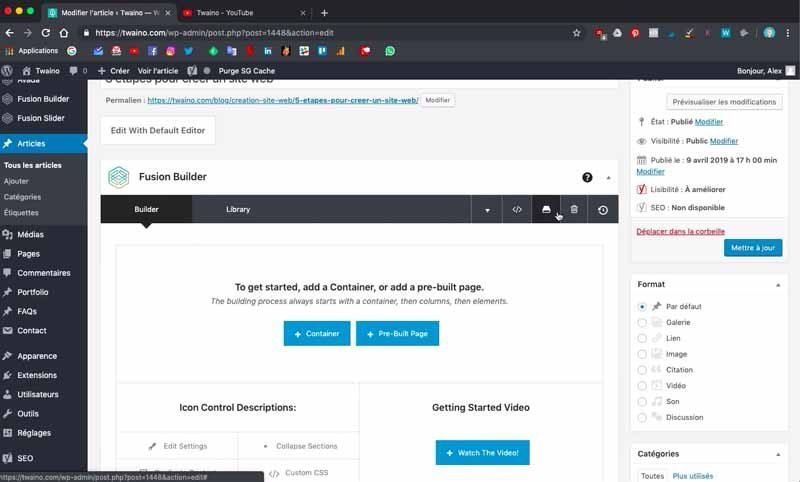
To do this, press the third icon located on the same line as the two windows “Builder” and “Library”.
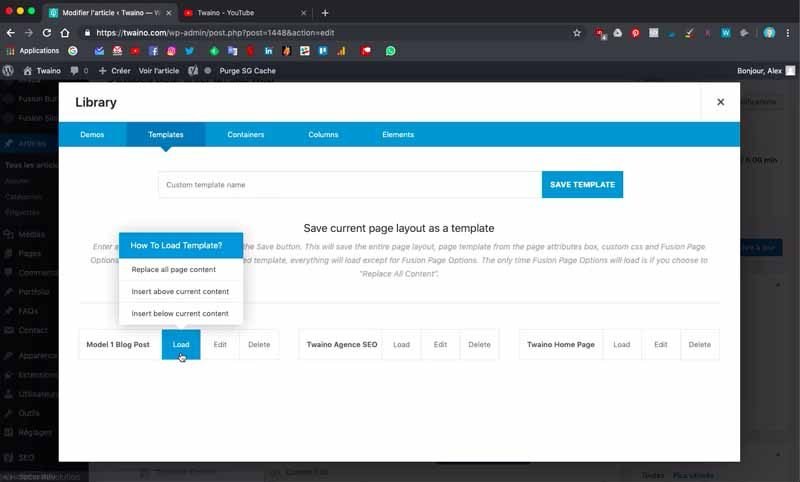
Then select the “Template” window which directly follows “Demos”.
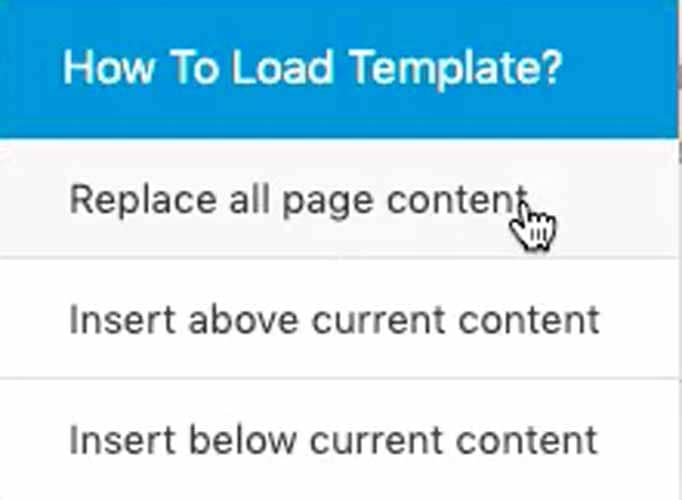
At my level, I want to load the template entitled “Model 1 Blog Post”. To do so, I click on “Load”, which gives me three options:
- Replace all page content : To replace all the content of the default page with the content of the template;
- Insert above current content : To insert above the template on top of the default page content ;
- Insert below current content : To insert below the default content of the page, the current template.
- I choose at my level the first option and I will see what the page of my article looks like. To do this, I click on “Preview” which is right next to “Update” in the bottom right corner.
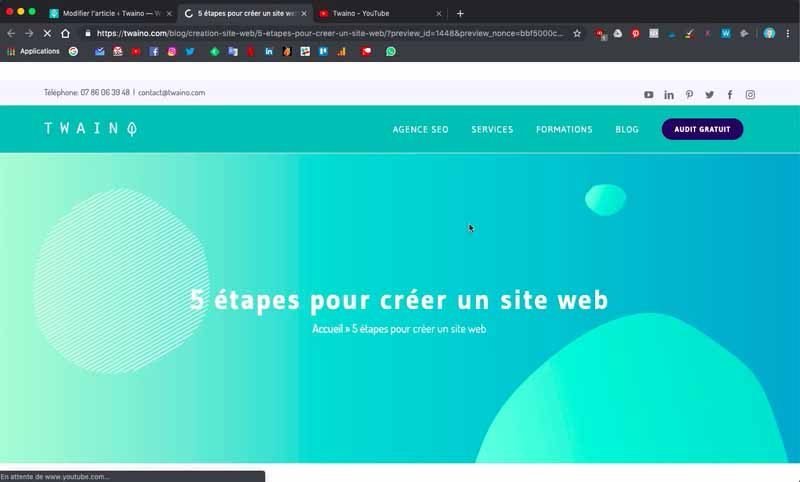
So I have a first presentation of what my article will look like and you can already see that the title of my article appears on the “Revolution Slider” of the page.
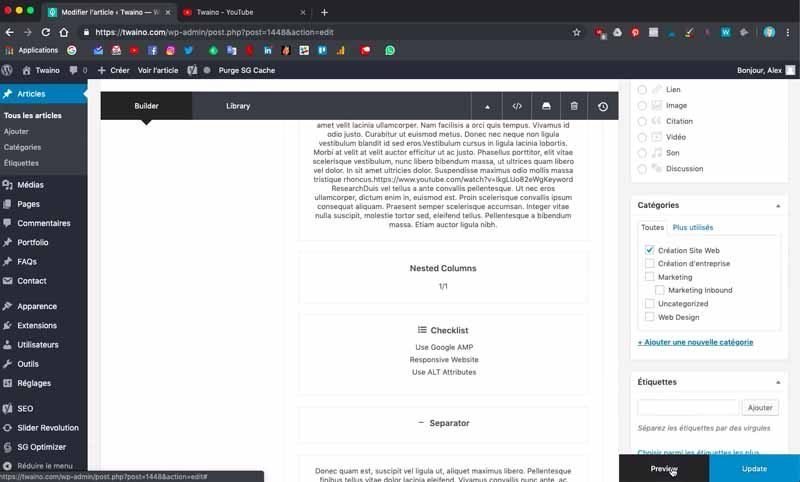
I then click on “Update” to save this modification.
6) Insert the image that will be highlighted
The image that will be highlighted is nothing more than the one that appears when you go to your blog, it is usually accompanied by the title of your article.

Currently, I don’t have this type of image for my new post yet. So I will insert an image for mine.
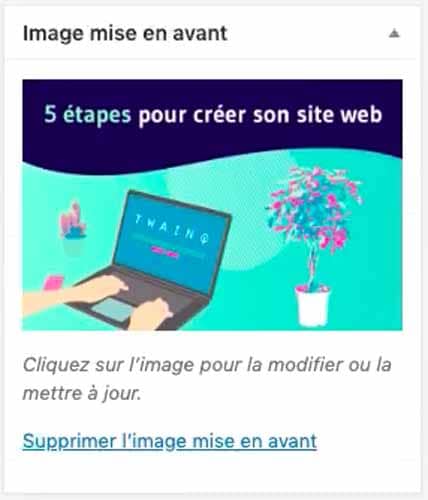
To do this, click on “Set Featured Image” located in the right sidebar.
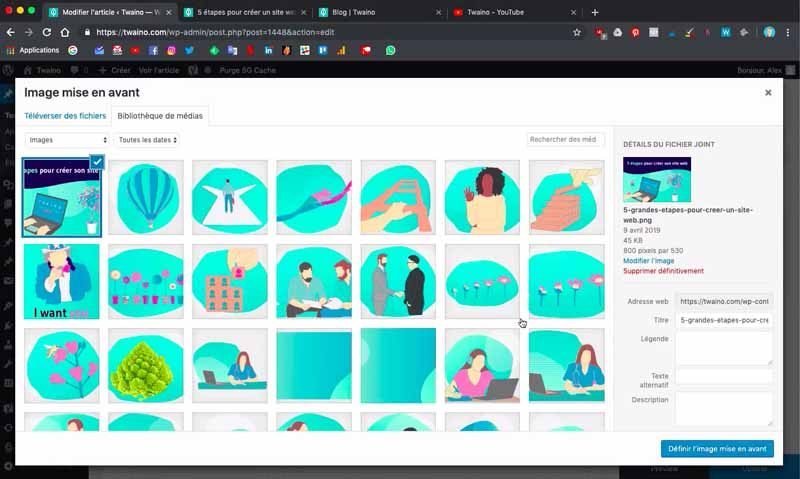
You will be redirected to the “Media Library” of your website where you can select the image you wish to highlight.
In case your image is not in the library, select “Upload Files” to upload the image from your computer.
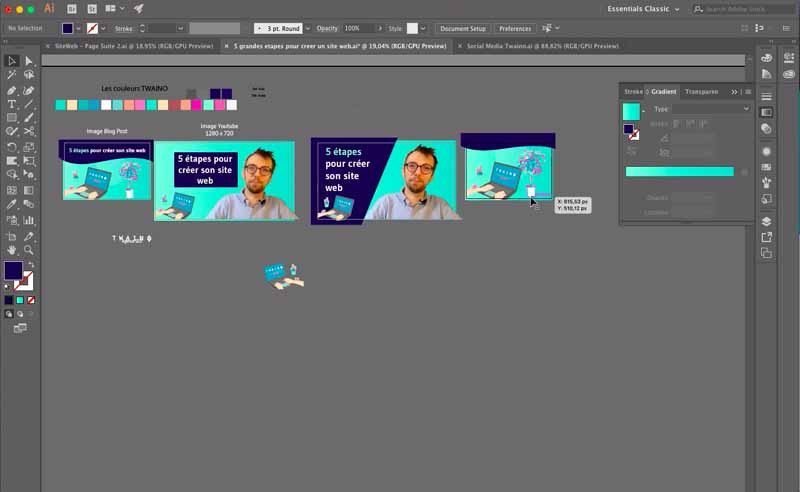
In fact, I’ve already created an image for this article that I just need to upload. To make it faster, just hold down the image on your computer and drag it to your website’s “Media Library”.
The image will load and you can name it and add a description to it in the right sidebar that displays its information.
Finally click on the blue “Set Featured Image” button.
7) Insert an image above the text of your article
In order to avoid redundancy in my article, I have created different images with the software “Adobe Illustrator”. I will insert the second image just above the text of my article.
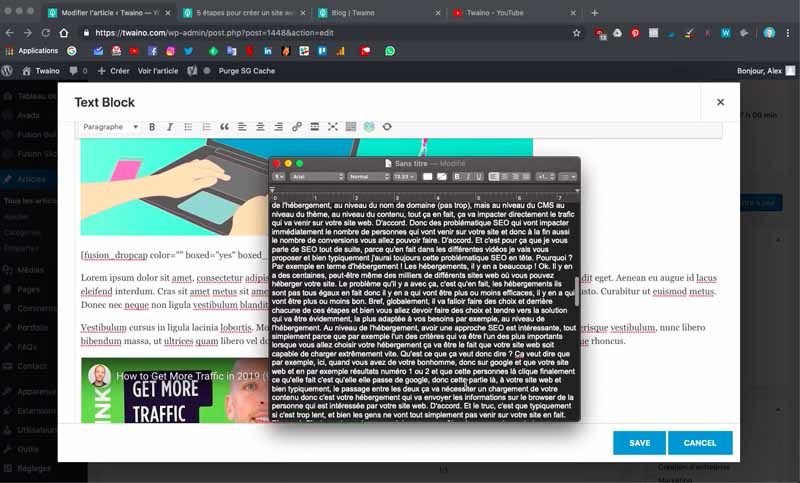
To do this, move the text down one line before clicking the “Add Media” button just above the text edit field.
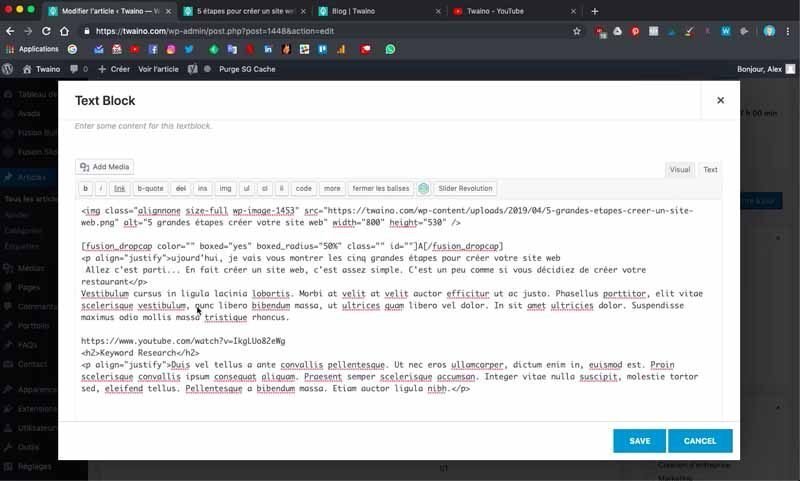
Then upload the image to the “Media Library” using the same principle as in the previous step.
The image will appear above the text.
8) Edit the text of your article
To edit the text, simply click on the pencil-shaped edit icon located on the text cell in question.
On the interface that appears, you have a text field that has word processing options. These include :
- Paragraph : Allows you to select between paragraph tags, titles from level 1 to 6 and preformatted ;
- B: Bold to make your text bold (< strong >) ;
- I: Italicize your text (< em >);
- Bulleted list (< ul >);
- Numbered list (< ol >);
- Quote block;
- Left-aligned text;
- Centered text ;
- Right aligned text ;
- Insert a hyperlink (anchor);
- Undo a hypertext link ;
- Insert a “read more” or “read more” tag;
- Open/close toolbar (displays bottom row);
You will have at the bottom other options like:
- ABC : Strikethrough text ;
- – Insert a horizontal line ;
- A: Choose the color of the selected text;
- T: Paste to Text;
- Eraser to clean up formatting;
- Ω: To insert special characters (Ø ⊕ ¢ © ® …) ;
- Decrease text indentation;
- Increase text indentation (shifts the beginning of the content to the right) ;
- Undo (Ctrl + Z) your last operation ;
- Redo (Ctrl + Y) what you have just undone ;
- ? keyboard shortcuts to gain productivity.
In the text field, there is a not very logical sequence of symbols that appears completely at the top of the text. In fact, this is the code that allows to display at the beginning of the article a letter with a size guard and a blue background. Since I want to use it, I leave it in its place.
Then, I copy the first paragraph of my article that I put in place of the text present by default.
At this point, take care not to delete the code at the beginning which starts with
and the end code
. In fact, these are the codes that delimit the paragraph.
9) Insert a video in your article
Just below the first paragraph, there’s a video that I’m going to replace with my own. To do this, I’m going to YouTube to copy the URL of the video, but in case you have trouble doing that, just do a simple share of the video in question to get its URL.

To insert the video itself, add a new “Element”. To do this, leave your text interface by clicking on “Save” in the bottom right corner.

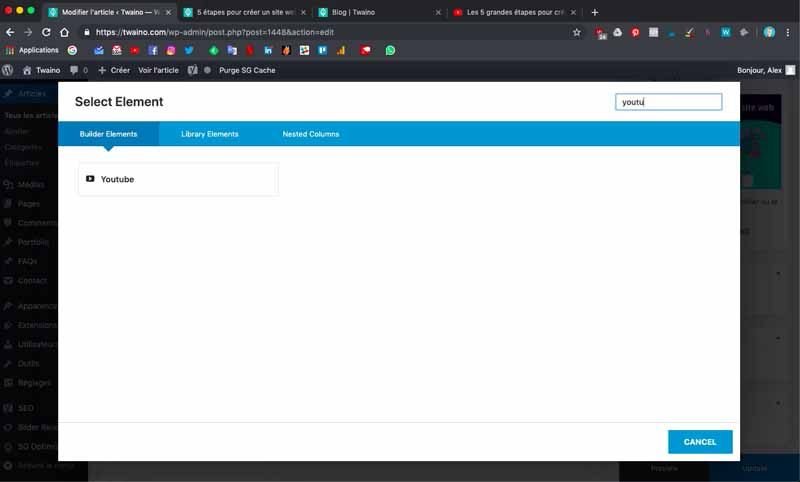
Select “+ Element” at the bottom of the column and on the page that appears, search for “YouTube”.
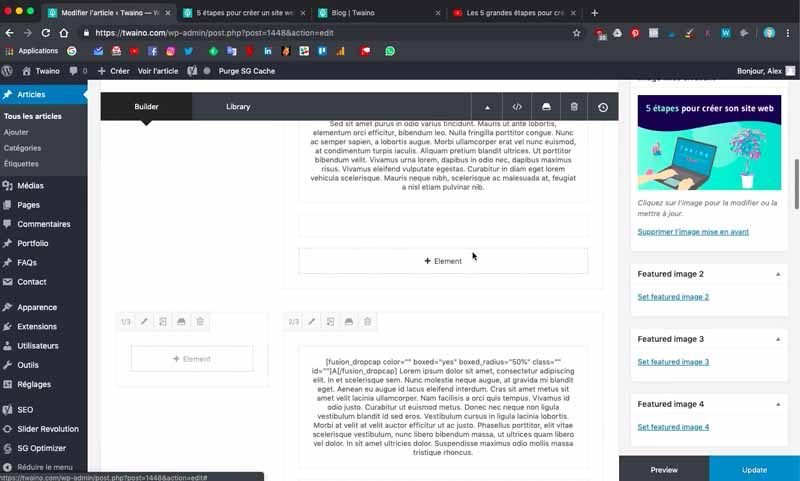
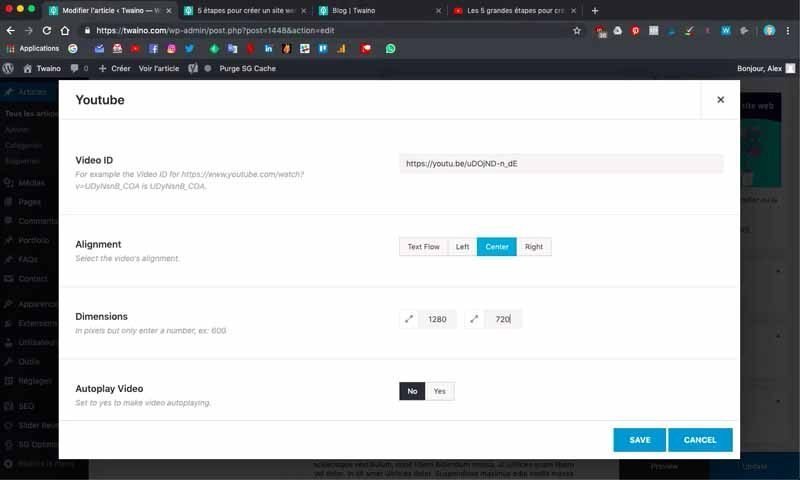
The corresponding element will appear and you just have to click on the button. Then, in the option :
- Video ID: Paste the URL of the video in the corresponding box;
- Alignment: Press “Center;
- Dimensions: Indicate the corresponding dimensions. For me, I indicate 1280 and 720 pixels.
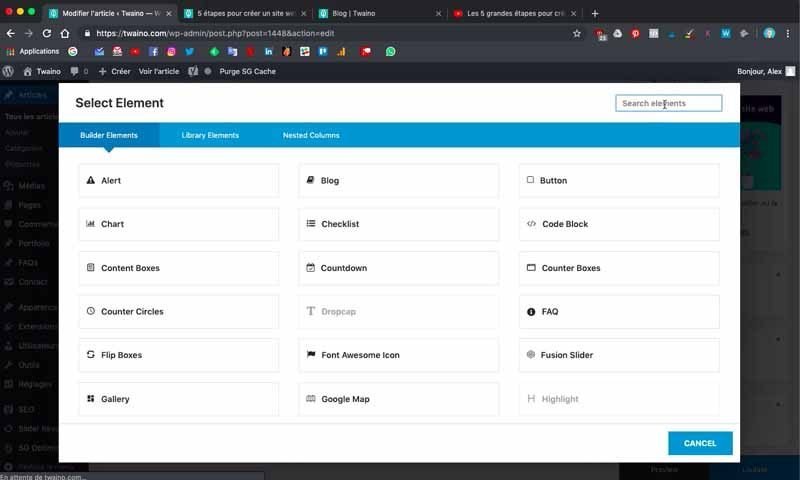
Save these changes and move this element back to its proper place, i.e. between the first text and the summary at my place.
Afterwards, I see the new changes, the video is correctly inserted, except that there is still the old video and texts that accompany it.
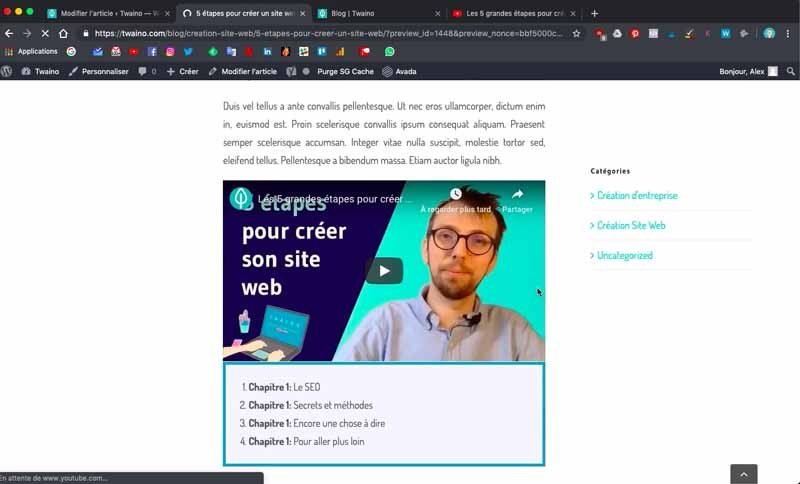
10) Delete the default video
Click on the text edit icon and in the text edit field, simply select the default video and accompanying text and press the “Delete” key on your keyboard.
Then save and also click on “Update” to see the page rendering.
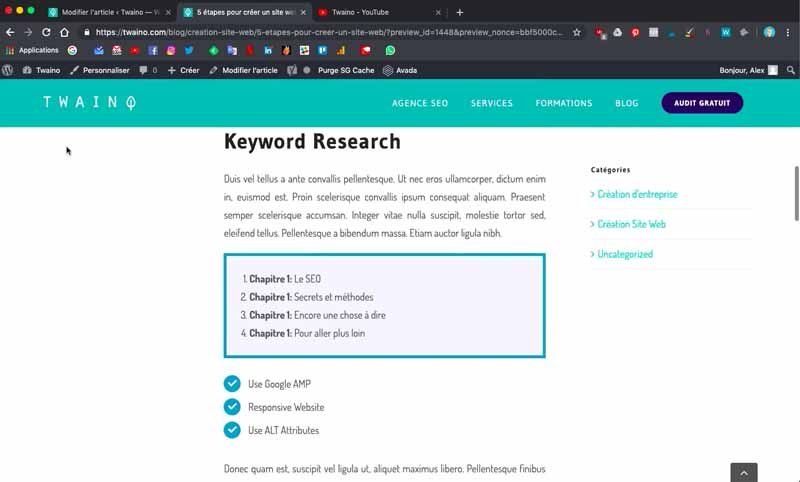
I have what I want to have: The first image => the first paragraph => the YouTube video => the article summary.
However, there is not enough space between the video and the summary, so I duplicate the “Separator” element that I place between the two to separate them.
11) Change the summary
To change the clickable summary, just click on the edit icon in its cell and manually change the default text.
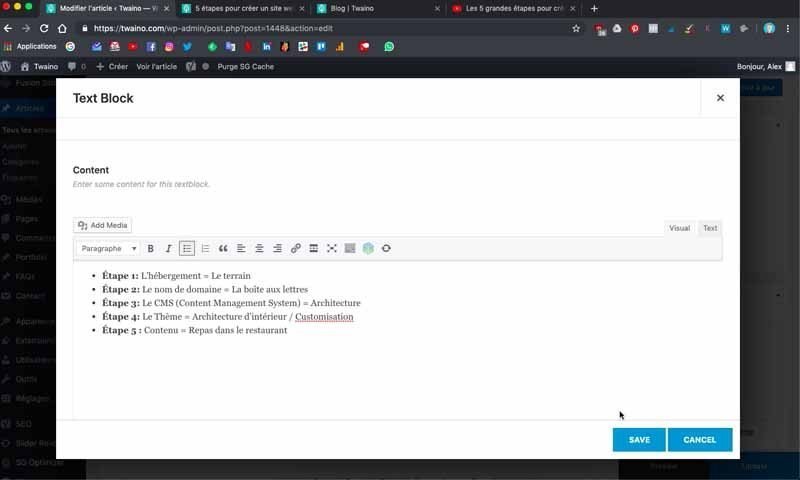
At my level, I write :
- Step 1: Hosting = The land ;
- Step 2 : The domain name = The mailbox ;
- Step 3 : CMS (Content Management System) = The architecture ;
- Step 4: The theme = Interior design/Customization ;
- Step 5: Content = Meals in the restaurant.
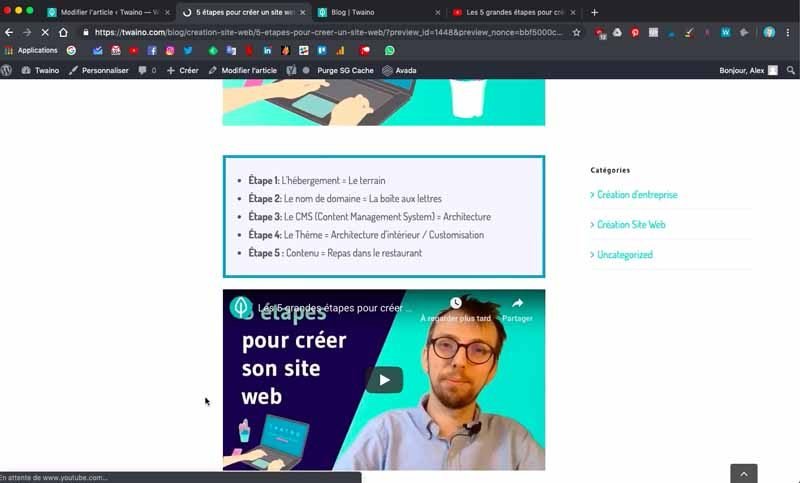
It is also possible to add links to each title. To do this, select the title in question and click on the icon symbolizing a chain that comes just after the right alignment of the text.
After this summary, I also add a small text before the YouTube video. Remember to save by clicking on “Update” and “Preview” to see the changes.
12) Add the body of your article
To add text content, simply click on the edit icon in the text box below your YouTube video and summary.
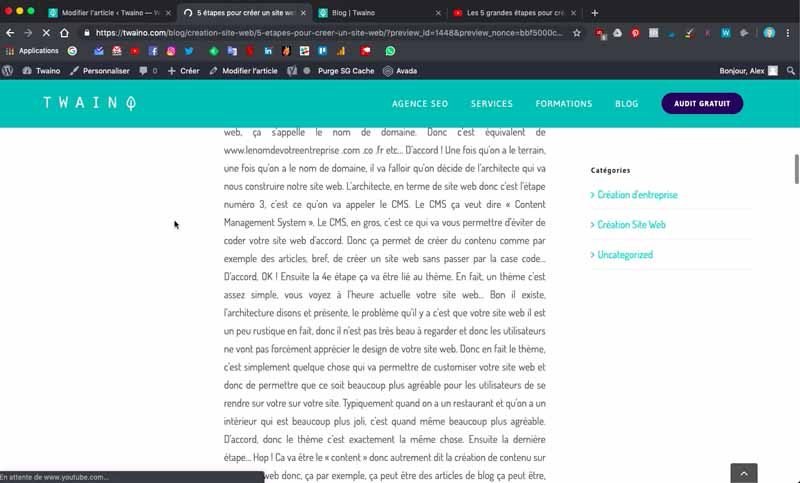
You can then simply copy and paste, taking care to format your text. Remember to use the tags and to space them well:
- Headings;
- Sentences;
- Paragraphs;
- Etc..
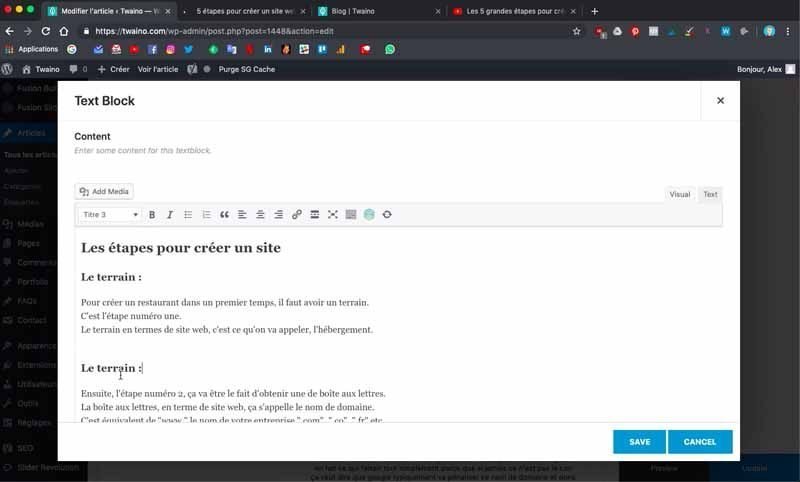
13) Insert images or illustrations in the text
After formatting your text, you can now insert illustrations, images… to enrich your text.
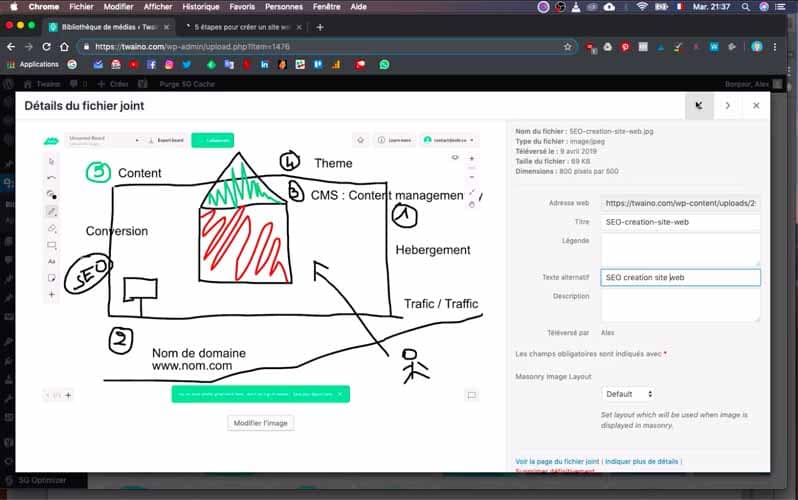
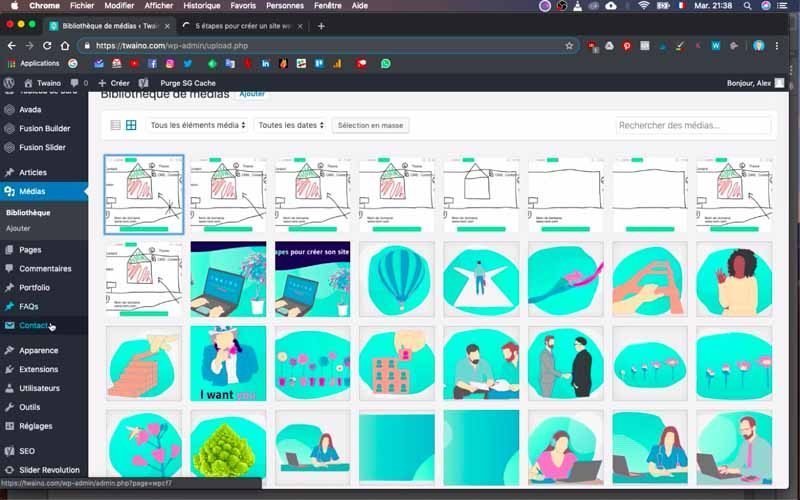
To do this, click on the “Add media” button located at the top of your text field and upload the images of your choice following the same principle as in step 7.
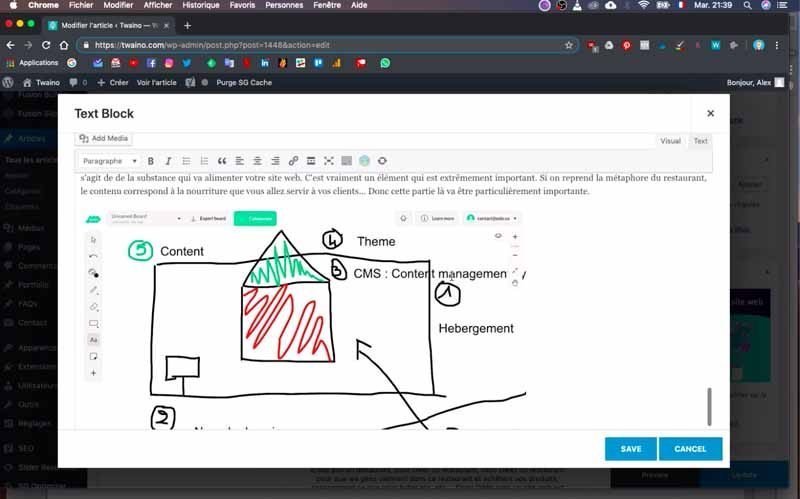
Remember to name your images and place them exactly where you want them in the text.
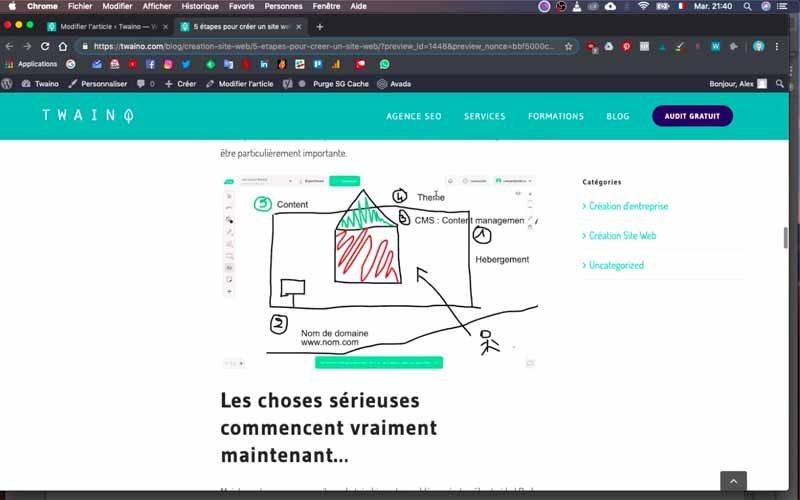
14) Check the presentation of your article
After you have finished formatting your article, save it and go to its page to check that each element is in its place. If not, proceed to correct them. Also, don’t forget to make the article public or if you have a schedule, to schedule its publication.
That’s it! We have just published our first article.

Conclusion
Having a website is good, but it is still necessary that it can appear in the results of search engines to answer the requests of Internet users. For this, creating content through a blog remains one of the best options to significantly improve the SEO of your website. That said, you have to start somewhere, hence the publication of your first article and from a technical point of view, it is a simple and easy process to achieve. The factor that seems to be the most complex remains the creation of quality content
with good formatting and insertion of relevant media that add value to your readers. This is a very important point to which you need to add a good strategy to guarantee your success.


