Short description : DHTML Tooltip Creator
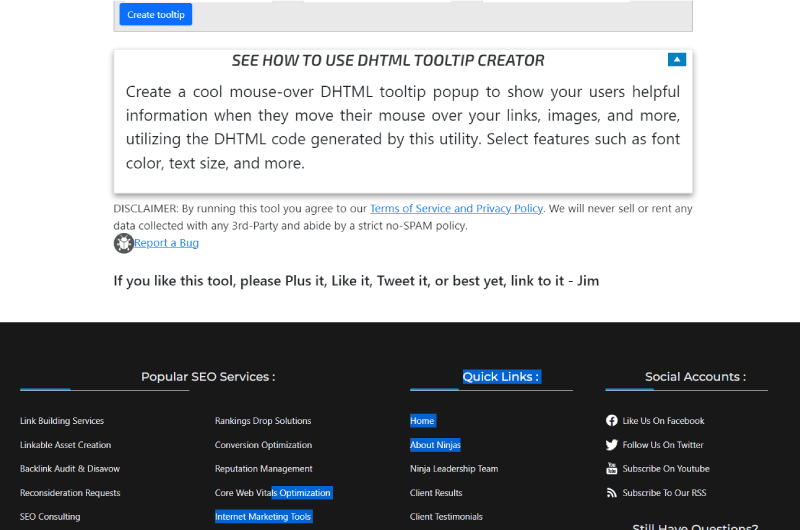
DHTML Tooltip Creator is a free online software developed by internet marketing ninjas to help website owners create a DHTML tooltip that shows useful information to users when they hover their mouse over your links, pictures, etc.
Long Description : DHTML Tooltip Creator
Description DHTML Tooltip Creator by internet marketing ninjas
Sometimes when users land on your website, they need more information before making a decision. In this case, tooltips are a perfect way to communicate more values to them in order to get them to act according to your expectations. For this purpose, DHTML Tooltip Creator is an excellent free tool developed by internet marketing ninjas to let you create custom tooltips. To learn more about this tool, I invite you to read this brief description.How to use DHTML Tooltip Creator from internet marketing ninjas?
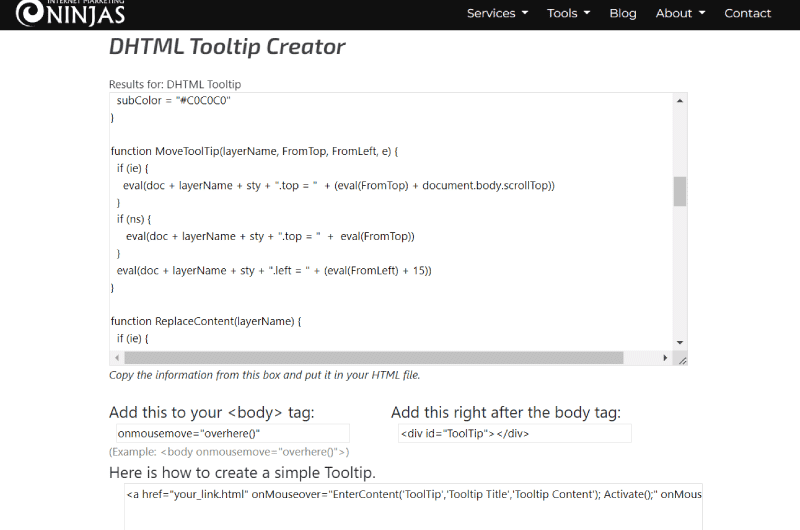
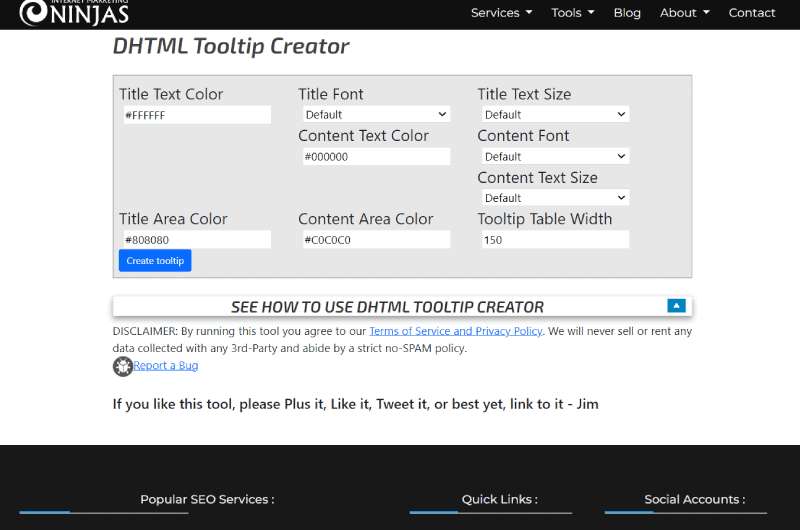
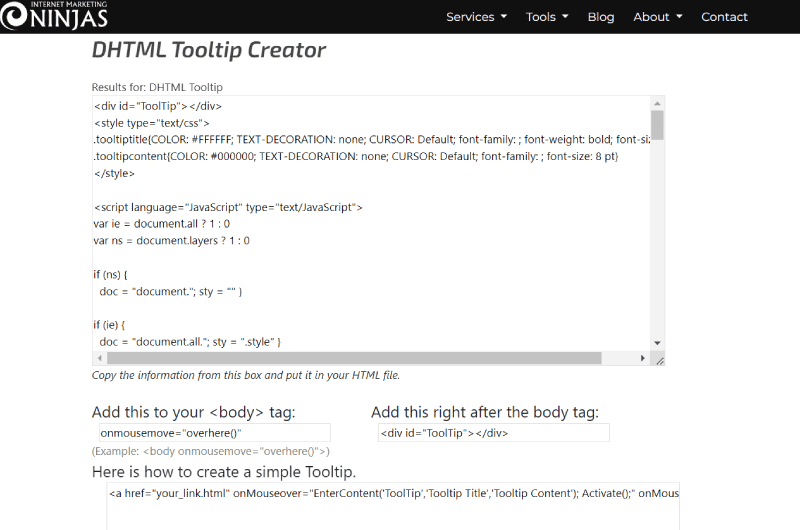
To use internet marketing ninjas DHTML tooltip maker feature, you just need to fill in the present fields that you see on the home page of the tool. You can select and customize settings like font color, text size, etc. Once this is done, you can generate DHTML to create a unique DHTML tooltip to display helpful information when your visitor’s mouse hovers over your links, images, or other elements. As an example, here is the DHTML you generated with this tool: <div id=”ToolTip”></div> <style type=”text/css”> .tooltiptitle{COLOR: Do you need an SEO audit?; TEXT-DECORATION: none; CURSOR: Default; font-family: ; font-weight: bold; font-size: 8pt} .tooltipcontent{COLOR: #000000; TEXT-DECORATION: none; CURSOR: Default; font-family: ; font-size: 8 pt} </style> <script language=”JavaScript” type=”text/JavaScript”> var ie=document.all? 1:0 var ns=document.layers? 1: 0 if (ns) { doc = “document.”; sty = “” } if (ie) { doc = “document.all.”; sty = “.style” } var initialize = 0 var Ex, Ey, topColor, subColor, ContentInfo if (ie) { Ex = “event.x” Ey = “event.y” topColor = “Fill in the following fields to get a audit report within 48 hours.” subColor = “Do a general audit of your website to assess its performance on search engine results pages” } if (ns) { Ex = “e.pageX” Ey = “e.pageY” window.captureEvents(Event.MOUSEMOVE) window.onmousemove=overhere topColor = “Complete the following fields to obtain an audit report within 48h.” subColor = “Do a general audit of your website to assess its performance on search engine results pages” } function MoveToolTip(layerName, FromTop, FromLeft, e) { if (ie) { eval( doc + layerName + sty + “.top = ” + (eval(FromTop) + document.body.scrollTop)) } if (ns) { eval(doc + layerName + sty + “.top = ” + eval(FromTop)) } eval(doc + layerName + sty + “.left = ” + (eval(FromLeft) + 15)) } function ReplaceContent(layerName) { if (ie) { document.all[layerName].innerHTML = ContentInfo } if (ns ) { with(document. layers[layerName].document) { open(); write(ContentInfo); close(); } } } function Activate() { initialize=1 } function deActivate() { initialize=0 } function overhere(e) { if(initialize){ MoveToolTip(“ToolTip”, Ey, Ex, e) eval(doc + “ToolTip ” + sty + “.visibility = ‘visible'”) } else { MoveToolTip(“ToolTip”, 0, 0) eval(doc + “ToolTip” + sty + “.visibility = ‘hidden'”) } } function EnterContent( layerName, TTitle, TContent) { ContentInfo = ‘<table border=”0″ width=”150″ cellspacing=”0″ cellpadding=”0″>’+ ‘<tr><td width=”100%” bgcolor=” #000000″>’+ ‘<table border=”0″ width=”100%” cellspacing=”1″ cellpadding=”0″>’+ ‘<tr><td width=”100%” bgcolor=’+topColor+ ‘>’+ ‘<table border=”0″ width=”90%” cellspacing=”0″ cellpadding=”0″ align=”center”>’+ ‘<tr><td width=”100%”>’ + ‘<font class=”tooltiptitle”> ‘+TTitle+'</font>’+ ‘</td></tr>’+ ‘</table>’+ ‘</td></tr>’+ ‘ <tr><td width=”100%” bgcolor=’+subColor+’>’+ ‘<table border=”0″ width=”90%” cellpadding=”0″ cellspacing=”1″ align=”center”> ‘+ ‘<tr><td width=”100%”>’+ ‘<font class=”tooltipcontent”>’+TContent+'</font>’+ ‘</t d></tr>’+ ‘</table>’+ ‘</td></tr>’+ ‘</table>’+ ‘</td></tr>’+ ‘</table>’ ; ReplaceContent(layerName) } </script>What is HTML Tooltip?
The tooltip is an HTML language feature that allows you to display additional information about selected items. For example, if you hover your mouse over an item that uses a tooltip, you’ll get more information about that item. Tooltip text is an inline element, similar to span. You can use CSS to control the position of the tooltip text, giving you more flexibility in styling and positioning it. A tooltip on our web pages allows us to further communicate with the visitor by providing quick information on available products. HTML uses a method that sets the tooltip using the link with a title attribute. It is defined as follows: <a href=”” title=”tooltip_text”> Content </a> The text that appears in the title attribute, as shown in the syntax above, is a tooltip. So, if users want to see more information about the link, they can click on it. The title is called a global attribute, which means it can be applied to any element on the page. Just add a class or an id to the element. This allows you to add whatever you want, such as a paragraph or a div block, which can contain an entire column or other elements. Basically, a tooltip will appear at the top of the element when hovered over it. You can set the position of your tooltip (top, bottom, left or right) using a value defined in CSS. In general, if you want to create tooltips to give users more information about a specific element of your website, DHTML Tooltip Creator from internet marketing ninjas might seem like a great option. In addition to showing how you can use this tool, we’ve given more details about what is meant by tooltips in this description.Videos : DHTML Tooltip Creator
Images : DHTML Tooltip Creator
Company : DHTML Tooltip Creator
Internet Marketing Ninjas is a company founded in 1999 by Jim Boykin, with more than 10 years of experience in the field of SEO. The company’s mission is to help their customers get better traffic to their websites through secure methods.
Internet Marketing Ninjas specializes in optimizing pages and websites for search engines. Based in the United States in Clifton Park, the company is made up of 50 members who are all experts in their fields. Internet Marketing Ninjas offers the entire digital community complete digital marketing services, but also SEO services and tools. Among the 87+ tools developed by them, here are some free SEO tools they have developed:
- Social Image Resizer Tool;
- What’s My Browser Size Tool;
- HTML Source Code Viewer Tool;
- Meta Tag Analyzer;
- Domain Age Checker;
- Meta Tag Generator & Snippet Preview;
- Search Engine Spider Simulator;
- Keyword Combination Tool;
- URL Inspection Tool…
Contact : DHTML Tooltip Creator
- DHTML Tooltip Creator
- Check the Corporate Website
Social Media : DHTML Tooltip Creator
- Youtube
Others Tools : DHTML Tooltip Creator
 Alexandre MAROTEL
Founder of the SEO agency Twaino, Alexandre Marotel is passionate about SEO and generating traffic on the internet. He is the author of numerous publications, and has a Youtube channel which aims to help entrepreneurs create their websites and be better referenced in Google.
Others SEO Tools
All SEO Tools
Sorry, no content found.


